Thursday, February 27, 2014

Happy Blog-A-Versary to 3 Mommies!


One year has already passed since we began this blog adventure. It has been a fun year with many 
yummy recipes, fun crafts, product reviews and most of all love. 

We would like to thank each and everyone of our followers here as well as on our 
Facebook group and page

Thank you :)

Lets take a look back on the past year with some of our favourite posts.

(Clicking on the picture will bring you to the original post)


So here is to another wonderful year ahead!

Thank you all again so much for being there with us.

Remember, don't be shy to share your stories, treats and crafts with us!

Signed with love,

         photo 3mommiessig_zps86cc38de.jpg
The 3 Mommies: Jennifer, Olivia and Melissa


Wednesday, February 26, 2014

Fresh Strawberry Muffins


My kids have been on a muffin craze the last few weeks. They love to eat foods they can pick up and without forks or spoons involved. I guess it faster to get the food into their mouths and floor, chew, swallow, then get back to causing havoc!! They are good at that. 

This yummy recipe was a shared link on Facebook that popped up one day on my news feed. It looked too good to pass and I just had to try and make them myself. 

The mix of sweet strawberry and the spice from the cinnamon are the perfect match to an afternoon tea. 

Right out of the oven!


Fresh Strawberry Muffins
1/2 cup butter, softened
3/4 cup sugar
1 egg
2 cups of flour
2 tsp baking powder
1/2 tsp salt
1/2 cup milk
1/2 tsp vanilla
1 1/2 cups chopped strawberries
3 tsp sugar
1/2 tsp cinnamon


Cream butter and sugar. Add egg and mix well.

Sift flour, baking powder, and salt in a small bowl. Add flour mixture and milk alternately to butter mixture. Add vanilla. Gently stir in strawberries.

Spoon batter into muffin pans.

Combine sugar and cinnamon and sprinkle over muffins.

Bake at 375ยบ for 20-25 minutes.

Makes one dozen muffins.


Do you have a good muffin tin recipe you would like to share? Let us know on Facebook and it can be featured on our blog!

By Mommy Melissa
 photo 3mommiessig_zps86cc38de.jpg

Tuesday, February 25, 2014

Macaroni Bracelets!

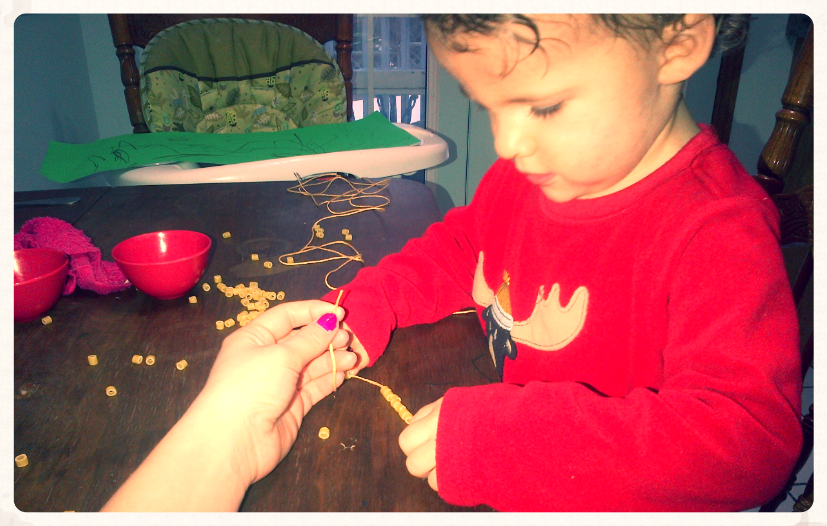
Noah loves to do crafts, I will say this time and time again and I hope that never changes because I love doing them just as much as he does! However, as the mommy it's my job to come up with new and exciting crafts to try, this one is one of my favs, it's so easy and really teaches the toddler hand-eye coordination. You don't just have to do bracelets, you can do necklaces as well! You can also use any type of pasta you like, as long as there's a hole through it! We used ditali pasta which to me resembles the most to beads.

 photo e4e5f9db-45fd-4ded-a7dd-39ae87daaf68.png


What you will need:
- Ditali pasta
- Hemp string (any colour)

You can get hemp string from the dollar store, I like using this because it's sturdy and thicker than normal string, it's a lot easier for a toddler to put the macaroni through.

So all you have to do it triple knot one end and let you toddler put the pasta through, you will be surprised on how well coordinated they are! Once the beads are through triple knot the other end so they stay- depending on how big your pasta is will depend how big the knot will be. There you have it! Little masterpieces!

POST BY MOMMY OLIVIA

 photo 3mommiessig_zps86cc38de.jpg

Monday, February 24, 2014

Vegan Chopped Taco Salad

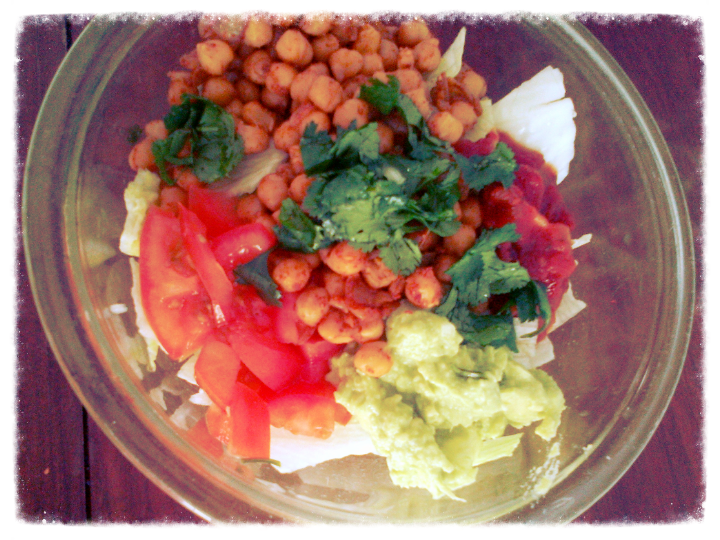
This recipe is from Pinterest (you can get the original recipe from HERE), and I would definitely say this is a pin win! The flavours came together nicely, it was simple enough to make, and it's healthy!

 photo 7cc8cb3f-3489-44af-ab06-088412707737.png


What you will need:

Taco “meat”
  • ½ white onion, sliced
  • 3 tablespoons water
  • 1 cup cooked chickpeas
  • 1 teaspoon taco seasoning mix
Guacamole
  • ½ avocado flesh, mashed
  • 1 tablespoon finely diced white onion
  • 1 clove garlic, minced
  • 1 tbsp finely chopped fresh cilantro
  • Juice from ½ lime
  • Sea salt and freshly ground pepper, to taste
Salad Ingredients
  • 2 cups chopped romaine lettuce
  • 1 tomato, chopped
  • 2 tablespoons salsa
Add onions and water to a pan on medium-high heat for about 2-3 mins until the onions are softened. Then add chickpeas and taco seasoning and reduce heat to medium. Cook uncovered for another 2-3 minutes, until heated through.
 
Meanwhile, add guacamole ingredients to a small bowl and mash with a fork to combine. Set aside.
 
Pile all of the salad ingredients in a bowl. Top with guacamole and taco “meat”.
 
Variations: The original recipe also called for corn chips, I did not add those, but feel free for that crunchy texture! Also, this recipe only makes for one (A big serving however).

POST BY MOMMY OLIVIA


 photo 3mommiessig_zps86cc38de.jpg


Sunday, February 23, 2014

The Snow Days

We have been getting an excessive amount of snow this year, I mean we usually get a lot, but this has been ridiculous! and all that snow mixed with the -30 temperatures does not make for a pleasant day building snowmen, sledding or having snowballs fights. We occasionally get a day where it's only -1 outside, so of course we must soak up the "sun" as us Canadians do- and make a day of fun with hot chocolate and marshmallows of course!

Noah has had an odd obsession with frosty this year, he is so emotionally attached that when we are watching the movie he actually makes me turn it off right before Frosty melts, he says "no mama" and puts his hands around his eyes. It's the sweetest thing. So you must realize my excitement for his very first session of snowman building- a very big milestone in a toddlers life! Finally, a warmish day came while the snow is still here, so we ran outside to build Noah's very first Frosty.

 photo 03af56a1-093c-4e5d-b8ac-0ccf3dc929c4.png


 photo 15d4d727-915e-4c87-aa84-baa69e727bd3.png

 photo 16631492-c18a-4d71-ad0b-0d17db5f0a86.png

Don't forget to bundle up!

POST BY MOMMY OLIVIA

 photo 3mommiessig_zps86cc38de.jpg

Saturday, February 22, 2014

Have you heard of Shutterfly?

Last year about this time a friend of mine was telling me about this great website where she goes to get all here pictures printed, and of course the picture fanatic that I am I immediately had to check it out! Now I am in love, I have ordered so many things from this website, from prints, to cards, mugs, magnets, there are just so many things you can create with you precious moments! The best part is, once you sign up  you get 50 free prints! So I invite you all to check out Shutterfly, it definitely makes great affordable presents for the special people in your life.

                        Christmas Card                                                                                         Magnets


So I invite you all to check it out and put your memories on display :) Visit www.shutterfly.com

POST BY MOMMY OLIVIA

 photo 3mommiessig_zps86cc38de.jpg

Kids Craft Idea - Shrinky-Dinks at Home!

Here is a simple and fast craft to do with your children this month. Its fast, simple and the best thing about it, your children get to use their art skills to come up with their own creative masterpieces.

Before they went into the oven
After they came out
The best pic I could get

All you need is:
#6 plastic (check out your recycle to see if you have any in there)
Permanent markers
Scissors
Cookie sheet covered in aluminum foil
Oven
Oven mitts


All you do is draw on the plastic with the markers then cut your design out as close as possible.
Preheat oven to 350.
Place on a cookie sheet coloured side up.
Put it into the oven for about 60 seconds. It may curl up a bit but once you take it out you can flatten it out with a knife in the first 10 seconds before it cools down and becomes solid.

You could even make jewelry this way. Just make a hole in the top before you bake them! 
What are some ideas you can think of to make with this craft idea?

By Mommy Melissa
 
 photo 3mommiessig_zps86cc38de.jpg

Thursday, February 20, 2014

Rockets Frosted Cookies


Halloween passed a few months ago and there is still a large bag of candy in a drawer in my room. In that bag there were rolls of Rockets candy. Seemed like it must have been on sale in this area at the time because there were a lot. And I mean A LOT! 

I decided that they would be made into something else, not just plain ol' candy to crunch on. But what? Then it hit me. If icing sugar is used in making icing, then what if I transformed the Rockets back into a powder format and replaced the icing sugar with it? It was worth a shot!

First I had to do the grueling task of unrolling all of the packets and placing them into a bowl. Once they were all having a colourful rainbow party in the bowl, they needed to be sorted into batches by colour/flavour. Be sure to taste as many as you would like at this point! My favourite was the orange!


Once the batches were sorted I broke out my Magic Bullet Blender and threw a single colour, starting with white to darkest, in at a time and blended it into a super fine powder. Then repeated it with the remaining colours, knocking off any remaining powder from the last batch.


(I used a simple sugar dough recipe from a cook book. Similar to this one here )

To make the frosting, I used a simple icing sugar frosting replacing the sugar with the powdered Rockets. 
(1 cup powdered sugar, 1 tbs melted butter, 1 tbs milk)
Mix all the ingredients together flavour by flavour. The icing is super sweet. Very, very sweet! 
Now ice you cookies with your new rockets flavoured icing and enjoy!


I cannot stress enough about how sweet these cookies are. You may get cavities after eating just one! 
Good Luck :)


By Mommy Melissa
 photo 3mommiessig_zps86cc38de.jpg

Tuesday, February 18, 2014

Icy Fruit Pops

Its winter, freezing cold and what do my kids keep on asking me for? Fee-zees! Every day, over and over again. I stock piled them from the summer but there are none left. How can you explain to a one year old and a two year old that they are not in season and mommy has no idea where to find freezies in the middle of winter?! You cant. I tried!


Since popsicles are about the same thing. I dug out my icepop molds and was going to just use juice when an idea came to me. I had a few cans of peaches in the pantry. What if I pureed them and froze that instead? 


It worked well. They loved it! They still ask for Fee-zees but they are pleased with these icy fruit pops. Especially the star shaped ones.

Do your kids ask you for out of season products? What solutions have you come up with?


By Mommy Melissa
 photo 3mommiessig_zps86cc38de.jpg

Sunday, February 16, 2014

Winter Bird Feeder DIY

Want to make a fun project with your kids this never ending winter? This has been an idea stuck in my head for a few weeks now and finally was put into works with my two lovely nieces. 

It is very simple but my two are too young for it. They like to put everything in their mouths. Bird seed and lard...not so yummy! They sat out this one. 

Mix up wild bird seed, raisins, peanut butter and lard in a bowl.

Use your hands if you want to get messy!

Push the mess, I mean mix into a disposable cup and let it harden in the freezer or outside if its very cold

Hang it in a tree and feed your new little bird friends!


DIY Winter Bird Feeder

Supplies
bag of wild bird seed
about 1 tbs peanut butter
a small handful of raisins
about a cup of lard, softened
disposable cup

Mix all the ingredients together then firmly press into the disposable cup.

Leave it to harden either in your freezer or outside if the weather is below freezing.

Once its solid, cut the cup along the side and remove it. 

You now can put it into a bird feeder you already have or simply cut two holes in the sides of a juice container or something along the same line, place the feed into it and hang from the tree.

Try it out if you want to attract some beautiful birds to your yard!

By Mommy Melissa
 photo 3mommiessig_zps86cc38de.jpg

Saturday, February 15, 2014

Salt Dough Hand Prints

Awhile back on the 3 Mommies Facebook Group, a member posted this picture.


Looked like a fun and easy project to do with my toddlers, my nieces and nephew. We did these awhile back in November so they would be able to give them to their parents for Christmas. I just had no computer to use to post at the time. So here they are now! In February! 

Here are some pictures of the fun time we had!


Give it a try!

By Mommy Melissa
 photo 3mommiessig_zps86cc38de.jpg