Showing posts with label Cakes and Cupcakes. Show all posts

Thursday, October 30, 2014

Scarecrow Cupcakes

I have been meaning to post these sooner, but this month has been so crazy! This past Thanksgiving I made this little dudes and not only were they fun to make, but they are tasty as well! Now you can either make your favorite cake from scratch or use a box mix- which is what I had to do because I was so short on time!


What you will need:
- Shreddies Cereal (for the hats)
- Pretzel sticks (hat)
- M&M's (for eyes and nose)
- Mini Chocolate Chips (for the mouth)
- Chow Mein noodles (uncooked, for the hair)

So you bake your cupcakes as usual, then icing them with a knife. Then decorate the little faces! You can use different candies and different variations, let your imagination run free!

In need for a killer frosting recipe? Look no further- Buttercream Frosting

What you will need: 
- 1/2 cup of butter (softened)
- 1 tbsp vanilla extract
- 4 tbsp milk
- 4-6 cups of confectioners sugar (depending on the consistency you desire)

In a medium size bowl, whip together butter, vanilla and milk, until smooth, slowly add in sugar, beat until light and fluffy- don't forget to scrape the sides so it\s all combined!


POST BY MOMMY OLIVIA


Wednesday, April 30, 2014

Have a BLAST with a DIY Minecraft party!

DIY MINECRAFT PARTY


My oldest son, Tristan, recently turned 8 (!!!). His choice for party theme this year was Minecraft, which I knew he would pick and I was probably more excited about than he was. If you're unfamiliar with the game, which can be played on XBox, PS3 and PC, I call it "virtual lego". You can build almost anything your heart desires, as well as mine for gold and diamonds. There are some "bad guys" but as far as video games go, they're fairly tame and the game is not gory at all.
 
 
I'll start with the invites.
 
 
I googled a few Minecraft pictures, downloaded the Minecraft font from here and used a program on my computer called PrintProjects to put everything together. I then printed everything on standard printer paper, cut each section out, and glued them onto green construction paper, which was then glued onto a slightly bigger rectangle of black construction paper.
 
Onto my favorite part: Décor!
 
I thought it would be a cool idea to make some real life Minecraft blocks for the kids to build with. Turns out, I was right, and the kids had a blast (heh, I'm so punny) building towers and forts, and pretending to be creepers and blow them up. The blocks were time consuming, but super simple. Just sturdy cardboard boxes painted with brown and green paint. I could have made them look pixel-ly like in the game, but I wanted to save a little time and the kids didn't even notice.
 
 
For the torches, I unfolded two cereal boxes and cut them to the size I wanted, leaving the flaps on. Then I folded them into the shape you see above, stuffed them with crumpled newspaper to make them a little sturdier, and taped them together. I covered them with paper and painted them as you see in the picture. All together, the blocks and torches took me about 8 hours from start to finish.
 
The rest of the décor was comprised of balloons, streamers, and paper.
 
 
For the spiders, I used black balloons and 4 long pieces of black streamer that I taped to the balloon in the middle to look like legs. I colored two squares of paper red and taped those onto the large end of the balloon (I would have used construction paper but I had no red and didn't want to make yet another trip to the dollar store) and tacked the whole thing to the ceiling, using tape for the ends of the legs.
 
The creeper balloons are just green balloons with a creeper face drawn on with sharpie marker. Easy peasy.
 
 
My Enderman! Same concept as the spiders. Black balloon, purple rectangles (again, I had to color these because I had no purple construction paper) and streamers for his arms and legs.
 
 
I got so many compliments on the goody bags. I sharpied creeper faces onto plain green paper bags from Party Max. The candy all represents items found in Minecraft:
 
Gold = Butterscotch candy
Diamonds = Clear mints
Melon = Gummy watermelon
Rocks = Chocolate covered raisins
Redstone = Sour cherry balls
Fish = Gummy fish
 
The kids really enjoyed being able to choose what they wanted to take home!
(The labels were not finished in this picture, but my daughter just wrote the names on squares of paper. I wanted to make signs with the actual Minecraft pictures of the items, but I forgot to email them to my husband so alas, it didn't happen. No one cared except me!)
 
 
Some more Minecraft snacks. Cookies, TNT (Twizzlers cut in half and wrapped with paper that I sharpied TNT onto), pretzel "Sticks", watermelon, and cracker "Fish". There's also a veggie tray just out of view because I wanted to get at least some healthy food in there somewhere. Our main course was pizza cut into squares (everything is square in Minecraft), pasta salad, potato salad (there are potatoes in Minecraft too!), and devilled eggs (eggs are also found in Minecraft, so I'm told).
 
 
The Brewing Station. Again, I wanted to make an official Minecraft sign and potion chart for this, but see reason above for the lack of it. I taped construction paper creeper labels around the water bottles, and made Kool-Aid syrup that I then poured into labelled squeeze bottles. The kids had a blast experimenting with different flavor combinations. The recipe for the syrups is as follows:
 
2 cups white sugar
1 cup water
1 pack Kool-Aid (I used cherry, strawberry, tropical, lemon-lime, and grape)
 
In a medium pot, combine sugar and water. Bring to a boil.
Boil for one minute, stir in Kool-Aid powder, and remove from heat.
Pour into heat-safe container and allow to cool. Once cool, pour into squeeze bottles.
 
The recipe made enough to fill each bottle twice for me. Depending on the size of bottles you use, you could end up with more or less.
 
 
And finally, my masterpiece! Chocolate cake with chocolate frosting, topped with marshmallow fondant and the red squares are fruit by the foot cut to size and stuck on by moistening the back with a tiny bit of water and pressing on gently. Here is the recipe and directions for the fondant:
 
2 cups miniature marshmallows
2 cups icing sugar
1 tbsp water
 
Place marshmallows and water in a microwave safe bowl. Microwave on high for one minute and stir well with a rubber spatula until no pieces of marshmallow remain. If you still see lumps, return to the microwave for another 30 seconds, repeating as necessary and stirring in between until the mixture is smooth.
Add icing sugar, stirring until mixture becomes stiff. You will likely still see some unincorporated sugar, that's fine. That will be incorporated in the next step.
 
Dust work surface with a good amount of icing sugar. This stuff is SUPER sticky. Pour/scrape mixture onto work surface, dust your hands with icing sugar, and knead until the fondant is no longer sticky and forms a smooth ball, adding icing sugar as needed. Be careful not to add too much or it will become difficult to roll out thinly.
Dust rolling pin with icing sugar, and roll out, turning fondant over and re-dusting surface with icing sugar frequently or it will stick and be a disaster. My test batch ended up stuck all over my kitchen counter because I didn't bother flipping or redusting. Not fun to clean.
When the fondant is rolled as thin as you like and big enough to cover your cake (I measured mine at 7" and added 2" for overhang). Use a pizza cutter or sharp paring knife to cut out your square.
Lift fondant (I used my rolling pin to drape it on so I didn't have to worry about tearing while I moved to where my cake was) and gently place on top of recently frosted cake (I frosted mine right before I started making the fondant). Smooth out the top and sides.
 
As I mentioned above, for the red squares I cut strawberry fruit by the foot into squares (for the big squares I cut two equal size pieces and used a dab of water to stick them together to form a square) and apply to cake by moistening the back of the squares and gently pressing onto fondant.
 
There you have it! I've never got so many compliments on a party as I did on this one, and it's probably one of the cheapest parties I've ever thrown, and by far the most fun!


Thursday, April 10, 2014

Strawberry-Banana Muffins

I've been experimenting with baking using whole wheat flour recently. With that in mind, I wanted to create something that was not only healthier than typical baked goods, but also yummy. I will say this right off the bat, these muffins are not SUPER healthy; there is a cup of brown sugar and half of the flour is regular all purpose, but there is plenty of fruit and the whole wheat flour so you don't have to feel totally guilty about scarfing one (or two) for breakfast or a snack. 

I noticed a few differences between my standard white flour muffins and these. One, these do not puff up as much. And two, they are considerably denser. This is because of the whole wheat flour. Also, they stick to the liners so if you don't use them, make sure you spray your muffin tins liberally with cooking spray. 

They passed the kids taste test though, so that's good enough for me.

Strawberry-Banana Muffins
(makes 12)

1 cup whole wheat flour
1 cup all purpose flour
1 cup brown sugar
1 tsp baking soda
1 tsp cinnamon
Pinch of salt
2 eggs
1 tsp vanilla extract
3/4 cup apple sauce
1 cup fresh or frozen banana chunks
1 cup fresh or frozen strawberries

The cast of characters:


1. If you're using frozen fruit, you will need to thaw it first. When that's done (or not, if you're using fresh), throw it in a blender and pulse until puréed. Set aside.

2. Preheat oven to 375. Line muffin tins with paper liners or spray tins with cooking spray.

3. Combine flours, baking soda, cinnamon, and salt in a large bowl. 

4. Add eggs, vanilla, sugar, apple sauce and vanilla extract. Mix on low until combined (or hand mix) 

5. Fill muffin tins/liners about 3/4 of the way full, and bake for 20 minutes or until toothpick comes out clean. Allow to cool completely on a rack.


Mommy Jenn
 photo 3mommiessig_zps86cc38de.jpg

Wednesday, February 26, 2014

Fresh Strawberry Muffins


My kids have been on a muffin craze the last few weeks. They love to eat foods they can pick up and without forks or spoons involved. I guess it faster to get the food into their mouths and floor, chew, swallow, then get back to causing havoc!! They are good at that. 

This yummy recipe was a shared link on Facebook that popped up one day on my news feed. It looked too good to pass and I just had to try and make them myself. 

The mix of sweet strawberry and the spice from the cinnamon are the perfect match to an afternoon tea. 

Right out of the oven!


Fresh Strawberry Muffins
1/2 cup butter, softened
3/4 cup sugar
1 egg
2 cups of flour
2 tsp baking powder
1/2 tsp salt
1/2 cup milk
1/2 tsp vanilla
1 1/2 cups chopped strawberries
3 tsp sugar
1/2 tsp cinnamon


Cream butter and sugar. Add egg and mix well.

Sift flour, baking powder, and salt in a small bowl. Add flour mixture and milk alternately to butter mixture. Add vanilla. Gently stir in strawberries.

Spoon batter into muffin pans.

Combine sugar and cinnamon and sprinkle over muffins.

Bake at 375º for 20-25 minutes.

Makes one dozen muffins.


Do you have a good muffin tin recipe you would like to share? Let us know on Facebook and it can be featured on our blog!

By Mommy Melissa
 photo 3mommiessig_zps86cc38de.jpg

Wednesday, November 6, 2013

Apple Carrot Cake with Pumpkin Spice Cream Cheese Frosting

Here is a quick cake idea I had come up with. Using the idea from a pineapple dump cake recipe, I decided to give it a shot! The end result was really tasty and perfect to finish off a meal in the fall. It has the flavours of autumn in it.

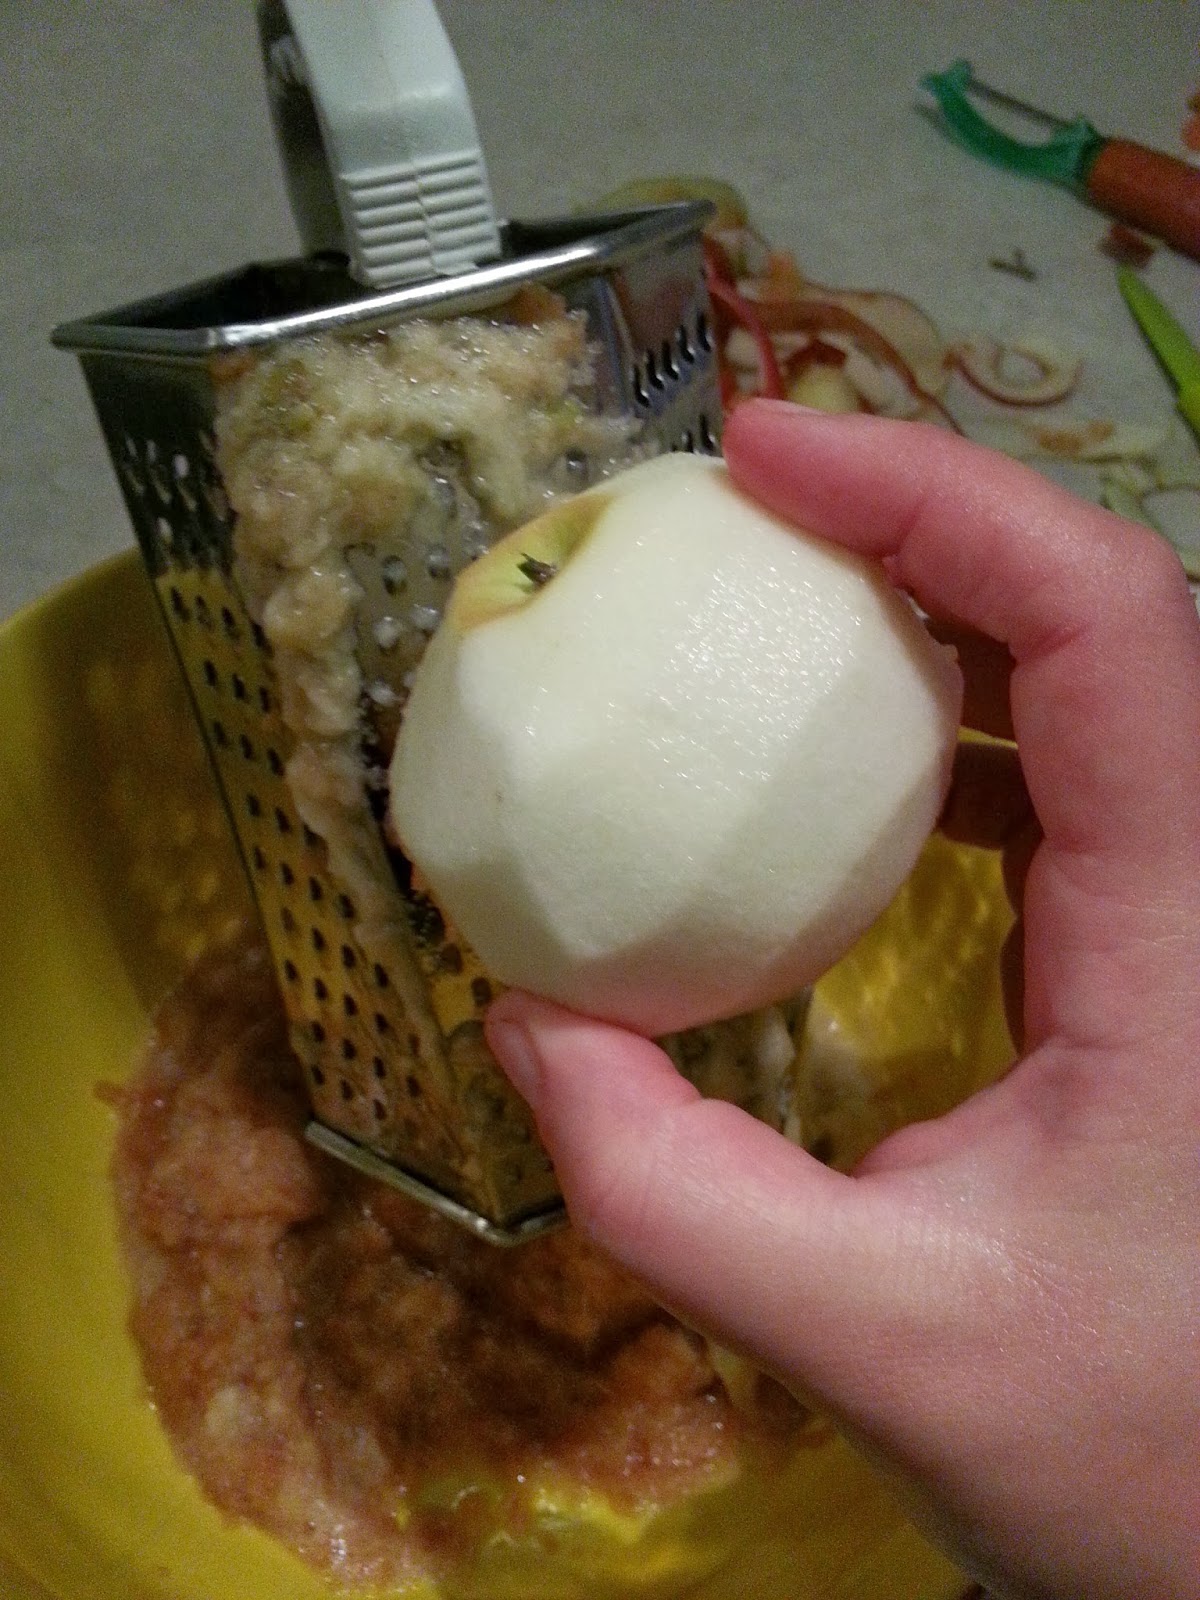
First I started by grating four large peeled apples. Then I poured a carrot cake mixture on top. Just the box of mix, not the other ingredients it called for. Once it was all mixed up I baked it for 40 minutes at 350.


While it was baking, I prepared the pumpkin spice cream cheese icing. (it tastes as good as it sounds!)


Mix them all together in a mixer and whip it until it is nice and fluffy. If you want to give it an extra pumpkin boost, pumpkin puree added would be amazing. I wanted to but there was none to be found that day.
Once the cake is out of the oven and cooled, ice it with the frosting then sprinkle with a little cinnamon for some pizzazz!

Here is the full recipe
1 box carrot cake mix
4 grated large apples, peeled
1 block of cream cheese, softened
3 cups icing sugar
1/2 tsp vanilla
1/2 tsp pumpkin pie spice
1 tbsp pumpkin puree (optional)
cinnamon to sprinkle on top

1. Mix the grated apples with the cake mix. Pour into baking dish.
2. Bake at 350 for around 30-40 minutes or until toothpick comes out clean.
3. Whip the remaining ingredients in a mixer until light and fluffy.
4. Spread the frosting over cooled cake. Sprinkle cinnamon on top.

Be sure to stay tuned for another giveaway coming soon! 

By Mommy Melissa

 photo 3mommiessig_zps86cc38de.jpg

Wednesday, October 16, 2013

Candy Corn Cupcakes

 photo 4cb0138b-94d3-42c0-9b01-444808f4d324.jpg

This recipe idea came from Pinterest of course. But it's so easy to do. You can either use a store bought cake mix or homemade... whichever you choose just make sure it's white cake mix!

What you will need:
- White cake batter (store bought or homemade)
- orange and yellow food colouring

 photo 182fff0d-3cf5-4df9-b5ed-6fd34a1bdf7f.jpg

Make the batter from the directions on the box, once done separate into 2 bowls, add orange food colouring to one and bright yellow to the other. Now you want to make sure your colors stand out so make sure there nice and bright- may need a couple extra drops of colouring!

Line your cupcake tins with cupcake liners, then first add a scoop of the yellow batter, then plop the orange on top of it, fill about half way or 3/4. then bake with the directions on the box, once you take a bite it will look just like a candy corn! Be sure to use white icing to complete the look :)

Definitely a crowd pleaser, perfect for Halloween!!!


 photo 01108d7d-bac4-4667-91f3-cb5cef4d56e3.jpg

 photo 3mommiessig_zps86cc38de.jpg

Thursday, September 5, 2013

Pumpkin Cupcakes

So continuing on fall posts, I thought I'd share this little number with all of you. I made these cupcakes last fall for Thanksgiving, there were delicious! Just the right amount of pumpkin and were a bid hit at our traditional family dinner! This recipe came from thejoyofbaking.com, they have amazing recipes I advise you all to take a gander for yourself!


So here's the recipe for these cups of heaven:

What you will need:

Pumpkin Cupcakes:

1 1/2 cups (195 grams) all purpose flour
1 teaspoon baking soda
1 teaspoon ground cinnamon
1/4 teaspoon ground ginger
1/4 teaspoon ground cloves
1/2 teaspoon salt
1/2 cup (113 grams) unsalted butter, room temperature
1 cup (200 grams) granulated white sugar
2 large eggs
1 teaspoon pure vanilla extract
3/4 cup (75 grams) solid packed, canned pumpkin puree


Cream Cheese Frosting:
4 ounces (113 grams) cream cheese, room temperature
2 tablespoons (25 grams) unsalted butter, room temperature
1/2 teaspoon pure vanilla extract
1 1/2 cups (175 grams) confectioners (powdered or icing) sugar, sifted
Garnish:
1 cup (110 grams) pecans or walnuts or English Toffee Bits


Pumpkin Cupcakes:  Preheat oven to 350 degrees F (177 degrees C). Place rack in the middle of the oven. Line 12 muffin cups with paper liners or spray each cup with a non stick vegetable spray.
In a large bowl, sift together the flour, baking soda, ground spices, and salt. 
In the bowl of your electric mixer, or with a hand mixer, cream the butter and sugar until light and fluffy. Add the eggs, one at a time, beating well after each addition. Beat in the vanilla extract. Scrape down the sides of the bowl. With the mixer on low speed, alternately add the flour mixture and pumpkin puree, in three additions, beginning and ending with the flour mixture.  
Fill the muffin cups evenly with the batter using two spoons or an ice cream scoop. Place in the oven and bake for about 18 - 20 minutes, or until firm to the touch and a toothpick inserted in the center of one of the cupcakes comes out clean. Place on a wire rack to cool.


Cream Cheese Frosting: In the bowl of your electric mixer, or with a hand mixer, beat the cream cheese until smooth. Add the butter and beat until incorporated and smooth. Add the vanilla extract and confectioners sugar and beat until fluffy (2-3 minutes). Pipe or spread the frosting on the cupcakes. Sprinkle with toasted and chopped nuts or English Toffee Bits.

Want to know more about this recipe? OR do you want more ideas to make your thanksgiving dinner perfect? click here


Tuesday, July 16, 2013

Monthly Feature: Mini Strawberry Shortcake, By Sarah


What you will need:
- 2/3 cup sugar
- Strawberries approx 3 cups chopped,
- 1 pkg of Sponge cakes,
- 1 pkg of Glaze mix.


Directions:

1. Add glaze mix and sugar into a bowl, mixing thoroughly
2. Gradually add 1 cup of boiling water and mix well
3. Add strawberries into the mix making sure they're all covered with the glaze.
4. Chill for 1 hr
5. Put on top of sponge cake and top with whipped cream if u want. 


Enjoy!

POST BY SARAH

Friday, June 14, 2013

Skinny Raspberry Lemonade Cake


So I told Phil (my boyfriend) to go to my Pinterest and chose anyone of my dessert recipes for Father's Day and I will make it for you. So this is what he chose...

What you will need:
- 1 box white cake mix
- 3 tsp Pink Lemonade Flavored Crystal Light Drink Mix
- 6 tbsp of GREEK raspberry cranberry yoghurt
- 3 egg whites
- 1 cup water
- 1 8 ounce container Cool Whip Free

Preheat over to 350. Combine all ingredients with your mixer. Pour mixture in to 9x13 inch cake pan (greased and floured). Cook for 25-30 mins (until toothpick comes clean) Once cooled apply a generous amount of Cool Whip on a slice of cake.

NOTE: If you do not plan on eating the cake right away leave it without the Cool Whip and just apply when ready to eat. 


 Original recipe from HERE 

This cake turned out really delicious, you can really taste the lemonade- for a less strong taste add less drink mix or pour on the Cool Whip! 

Happy Fathers Day Weekend to all the Dad's out there!  

POST BY MOMMY OLIVIA


Tuesday, June 4, 2013

Pinterest Challenge: Almond Joy Cupcakes

 I have made quite a few recipes from Pinterest and as you all know from your own experience some come out as a complete flop, and others come out as a complete masterpiece... this one was definitely a complete masterpiece! It was so easy too! I thought i was going to be tricky and not turn out like the pictures at all, but I'm glad I took the risk. I made them for my Dad's birthday everyone loved them, and I brought the leftovers to my work everyone said they were the best cupcakes they've ever had. Don't believe me? Try for yourself!

This recipe came from Your Cup of Cake blog. 

What you will need: 

Cake Ingredients: 

1 box Devil's Food Cake Mix
4 eggs
2/3 cup oil
1 small pkg. chocolate instant pudding
1 cup milk
1/2 cup sour cream
2 teaspoons vanilla extract 
Coconut Topping:

3/4 cup butter, softened
8 oz cream cheese, softened
1 1/2 cups shredded coconut
1 teaspoon vanilla extract
3-4 cups powdered sugar 
You will also need: 
1/2 cup almonds (whole or sliced- your choice)
3-4 cups chocolate melts
Cupcakes: 
Preheat over to 350 degrees. In a large bowl blend together all wet ingredients, once thoroughly combined add in the cake mix and the instant pudding. Line your muffin tins with cupcake liners, fill 3/4 of the way. bake for about 20 mins or until toothpick comes clean. Let cool. 

Coconut Topping:
blend together all ingredients except the sugar and the coconut. Once smooth add in the coconut- mix again. Add in the icing sugar 1 cup at a time until it reaches a thick icing. 

Pile a generous amount of the coconut topping on each cupcake, then smooth down. Melt your chocolate until smooth, then dip each cupcake in the chocolate- top with a couple almonds. Let the chocolate harden, then enjoy! 


Click HERE for step  by step pictures from original recipe. 

POST BY MOMMY OLIVIA


Monday, June 3, 2013

Pineapple Dump Cake -by mommy melissa

This recipe was givin to me by my mom Debbie! Super tasty and very moist! Plus, clean up is easy as you mix it all in the pan!
 photo 3mommiessig_zps86cc38de.jpg

Monday, April 1, 2013

Raspberry Dark Chocolate Cupcakes

What you need:
- 1 box of white cake mix
- 1 can of whipped frosting (or homemade buttercream frosting)
- 2 cups of dark chocolate wafers
- 1 1/2 cups of raspberries (frozen or fresh)

mix up you cake batter according to the package (yes, I cheated here, but feel free to make yours from scratch). In a food processor/blender add 1 cup of raspberries- blend until smooth. Add the berries to the cake mixture and mix until all blended together- put in muffin tins and bake according to package. 


 The icing: blend the rest of the berries in the blender until smooth and add to the icing. 


Once the cupcakes are cooked, cool completely. In a double boiler start melting the dark chocolate- all of it. while it's melting cut out the middle of each cupcake- this might take some time keep an eye on the chocolate!
Once the chocolate is melted pour the chocolate to fill the hole in each cupcake. Then icing them wipe a piping bag to make them pretty of course! Then drizzle the rest of the dark chocolate over each one- this is what makes it look AHMAZING.


You will most definitely get compliments on these!


Chocolate Chunk Banana Bread


The secret to making great banana bread is to never use a mixer! Mash and mix everything by hand... this will lead to moist delicious banana bread! 

What you will need: 
- 3 ripe bananas
- 1/3 cup melted butter
- 1 cup of sugar
- 1 egg beaten
- 1 tsp vanilla
- 1 tsp baking soda
- dash of salt
- 1 1/2 cups all purpose flour
- 1 - 11/2 cups of chocolate chips or chocolate chunks

Preheat oven to 350. Grease 4x8 loaf pan. In a large bowl add melted butter to the mashed bananas. Mix in sugar, egg, vanilla, baking soda and salt. Add flour. Add in you chocolate chunks. Pour mixture into pan and bake for 1 hour (or until toothpick comes clean) Let cool. Enjoy! 

So simply delish! 


Wednesday, March 13, 2013

Turtle Cupcakes

So my momma's birthday was this week and I decided to create something extra special for her, since her fav candy is "Turtles" I thought why not turn this into a whole lotta delicious in a cupcake?????? So the results were AMAZING. You must try this!

First pick a chocolate cake batter (I used box cake because I have a 1 year old and no time to bake from scratch!) But you can use any cake mix you like... so cook them as cupcakes obviously....


Add the Pecans, then drizzle with caramel and melted chocolate...
I hope you love these as much as m family did :)