Showing posts with label Recipes. Show all posts

Wednesday, August 13, 2014

Personal Pan Pizza with Easy No-Yeast Dough


Having two toddlers and a husband who always want to have pizza for every and any meal of the day,
I needed to make a recipe that was easy to fast and super simple to prepare.
I came up with this idea using a similar dough recipe from a cook book plus changed a few things to
make it how I wanted it to come out.
After two attempts, the recipe works great!
The dough is versatile enough to be used with different spices to give it your own personal touch.

Complete recipe is at the bottom.

This is all you need to make this pizza dough! 
Flour, baking powder, salt, warm water, and olive oil.
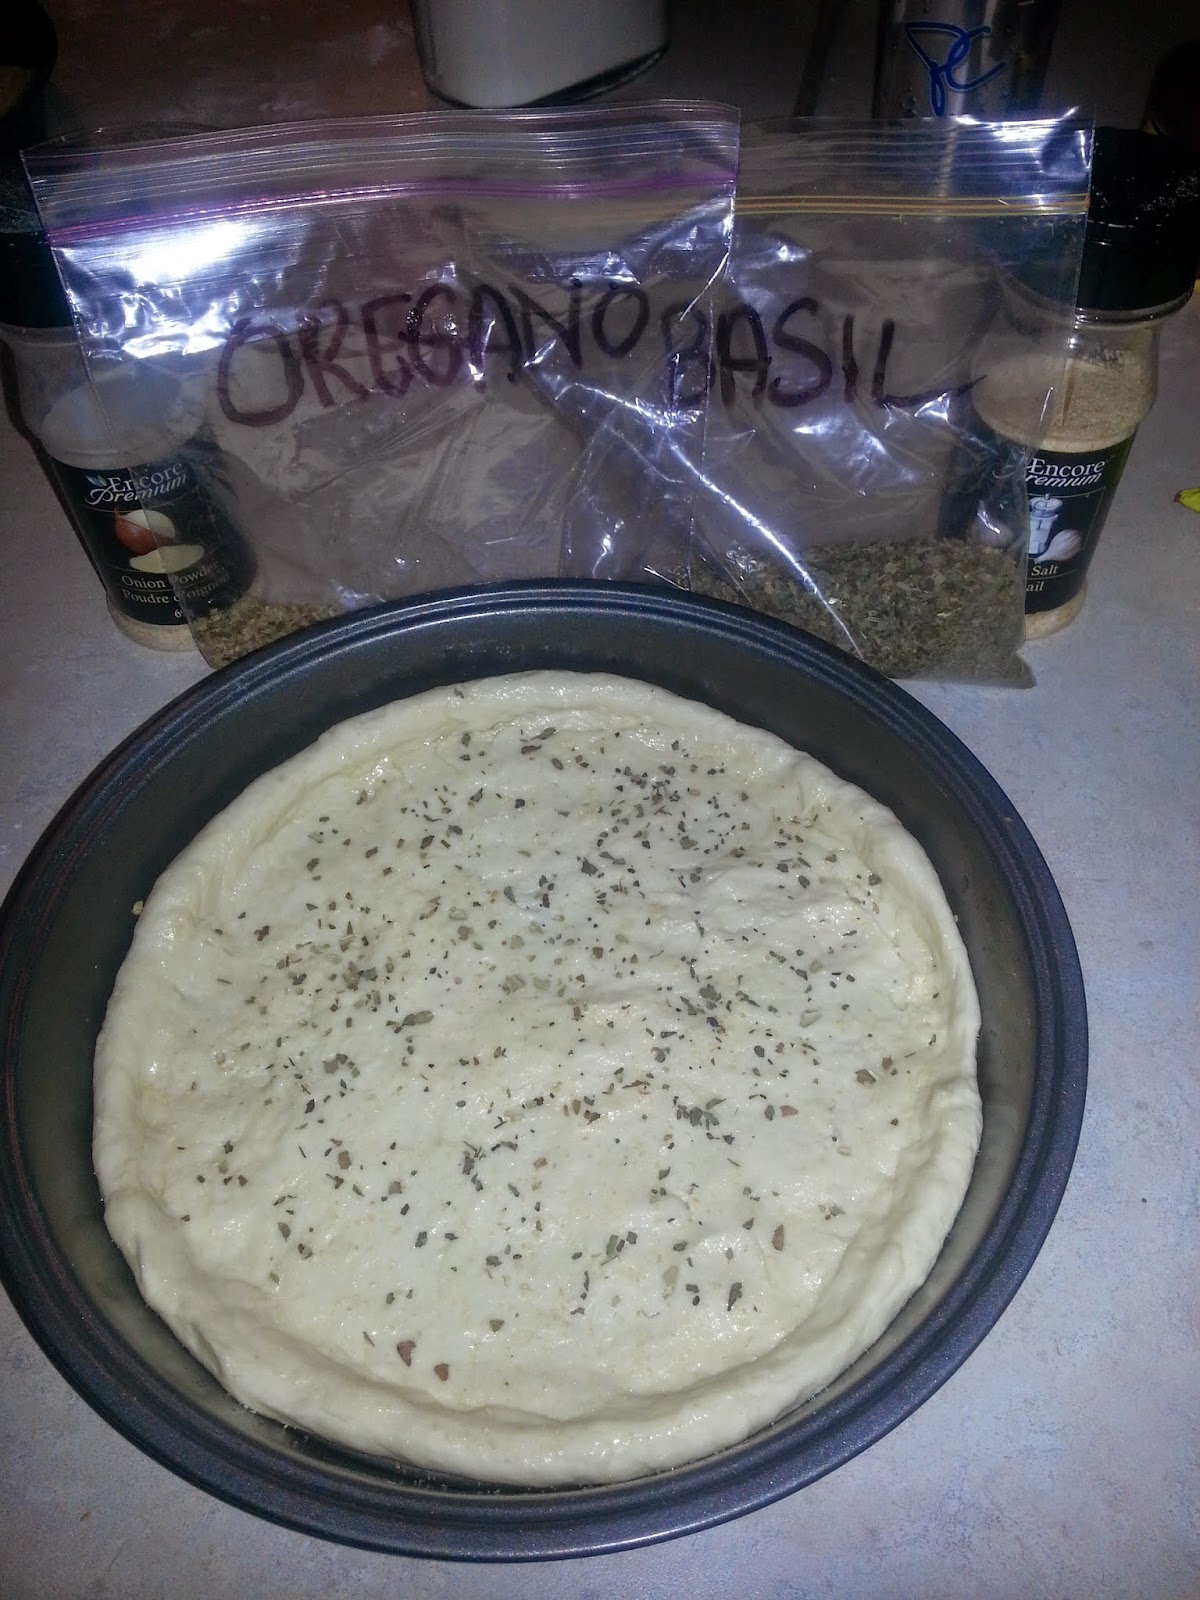
Adding some spices gives it that extra Italian flavour.

This dough is too sticky, it needs more flour.
This dough is perfect and ready to use.

When it comes to the spices you can use your own combinations you think would go well together. 
I like the taste of basil and oregano together with pizza. 
Some other options could be but are not limited to: 
garlic powder, onion powder, chili flakes, thyme, dried chives, chopped sun-dried tomatoes, 
cracked pepper, Italian seasoning, pretty much anything you think would taste good!


Once the dough has come out of the oven now you can add your toppings. 
I went with spicy pizza sauce, cheese, and pepperoni. 


Here are some of my families favourite topping combinations.

Alldressed - pepperoni, mushrooms, green peppers.
Veggies - green peppers, mushrooms, tomatoes, olives.
Italian -sausage, mushrooms, olives, fresh basil.
Buffalo Chicken - cooked chicken pieces, tomatoes, feta cheese, hot sauce.
Super Cheese - mozzarella, cheddar, parmesan, montery jack.

Some other topping ideas are:
spinach, black and/or green olives, onions, cooked bacon, cooked ham, pineapple, cooked ground beef,
garlic, hot peppers, sliced steak, and on and on and on!


Easy No-Yeast Pizza Dough
(makes two 9 inch pizzas)

2 1/2 cups of flour
2 1/2 tsp baking powder
1 tsp salt
1 tbs olive oil, plus more to drizzle over dough
1 cup of warm water, less or more depending on dough
1/2 tsp dried basil 
1/2 tsp dried oregano

1. Mix flour, baking powder, and salt together. 
2. Add the olive oil and warm water. If the dough is too sticky add more flour. If too stiff, more water.
3. Put dough on a surface covered with flour and knead for a couple of minutes. 
4. Grease a round cake or pie pan with some extra olive oil. 
5. Using you hands flatten the dough into a even circle, place into greased pan and stretch it the rest of the way to the edges and up a little to form a nice crust. Sprinkle with basil, oregano, and a little bit of olive oil.
6. Bake at 400f for about 25 minutes. 
7. Remove from oven then add your toppings. 
8. Bake another 5 minutes until cheese is all melty. Broil for a few more to make the cheese toasty brown.
9. Enjoy it with some extra warm pizza sauce on the side to dip it in!


Give it a try with your pizza lovers in your family! Get your kids involved by letting them help you knead the dough and flatten them out themselves. Then letting them top their very own pizza!


By Mommy Melissa

Wednesday, April 30, 2014

Have a BLAST with a DIY Minecraft party!

DIY MINECRAFT PARTY


My oldest son, Tristan, recently turned 8 (!!!). His choice for party theme this year was Minecraft, which I knew he would pick and I was probably more excited about than he was. If you're unfamiliar with the game, which can be played on XBox, PS3 and PC, I call it "virtual lego". You can build almost anything your heart desires, as well as mine for gold and diamonds. There are some "bad guys" but as far as video games go, they're fairly tame and the game is not gory at all.
 
 
I'll start with the invites.
 
 
I googled a few Minecraft pictures, downloaded the Minecraft font from here and used a program on my computer called PrintProjects to put everything together. I then printed everything on standard printer paper, cut each section out, and glued them onto green construction paper, which was then glued onto a slightly bigger rectangle of black construction paper.
 
Onto my favorite part: Décor!
 
I thought it would be a cool idea to make some real life Minecraft blocks for the kids to build with. Turns out, I was right, and the kids had a blast (heh, I'm so punny) building towers and forts, and pretending to be creepers and blow them up. The blocks were time consuming, but super simple. Just sturdy cardboard boxes painted with brown and green paint. I could have made them look pixel-ly like in the game, but I wanted to save a little time and the kids didn't even notice.
 
 
For the torches, I unfolded two cereal boxes and cut them to the size I wanted, leaving the flaps on. Then I folded them into the shape you see above, stuffed them with crumpled newspaper to make them a little sturdier, and taped them together. I covered them with paper and painted them as you see in the picture. All together, the blocks and torches took me about 8 hours from start to finish.
 
The rest of the décor was comprised of balloons, streamers, and paper.
 
 
For the spiders, I used black balloons and 4 long pieces of black streamer that I taped to the balloon in the middle to look like legs. I colored two squares of paper red and taped those onto the large end of the balloon (I would have used construction paper but I had no red and didn't want to make yet another trip to the dollar store) and tacked the whole thing to the ceiling, using tape for the ends of the legs.
 
The creeper balloons are just green balloons with a creeper face drawn on with sharpie marker. Easy peasy.
 
 
My Enderman! Same concept as the spiders. Black balloon, purple rectangles (again, I had to color these because I had no purple construction paper) and streamers for his arms and legs.
 
 
I got so many compliments on the goody bags. I sharpied creeper faces onto plain green paper bags from Party Max. The candy all represents items found in Minecraft:
 
Gold = Butterscotch candy
Diamonds = Clear mints
Melon = Gummy watermelon
Rocks = Chocolate covered raisins
Redstone = Sour cherry balls
Fish = Gummy fish
 
The kids really enjoyed being able to choose what they wanted to take home!
(The labels were not finished in this picture, but my daughter just wrote the names on squares of paper. I wanted to make signs with the actual Minecraft pictures of the items, but I forgot to email them to my husband so alas, it didn't happen. No one cared except me!)
 
 
Some more Minecraft snacks. Cookies, TNT (Twizzlers cut in half and wrapped with paper that I sharpied TNT onto), pretzel "Sticks", watermelon, and cracker "Fish". There's also a veggie tray just out of view because I wanted to get at least some healthy food in there somewhere. Our main course was pizza cut into squares (everything is square in Minecraft), pasta salad, potato salad (there are potatoes in Minecraft too!), and devilled eggs (eggs are also found in Minecraft, so I'm told).
 
 
The Brewing Station. Again, I wanted to make an official Minecraft sign and potion chart for this, but see reason above for the lack of it. I taped construction paper creeper labels around the water bottles, and made Kool-Aid syrup that I then poured into labelled squeeze bottles. The kids had a blast experimenting with different flavor combinations. The recipe for the syrups is as follows:
 
2 cups white sugar
1 cup water
1 pack Kool-Aid (I used cherry, strawberry, tropical, lemon-lime, and grape)
 
In a medium pot, combine sugar and water. Bring to a boil.
Boil for one minute, stir in Kool-Aid powder, and remove from heat.
Pour into heat-safe container and allow to cool. Once cool, pour into squeeze bottles.
 
The recipe made enough to fill each bottle twice for me. Depending on the size of bottles you use, you could end up with more or less.
 
 
And finally, my masterpiece! Chocolate cake with chocolate frosting, topped with marshmallow fondant and the red squares are fruit by the foot cut to size and stuck on by moistening the back with a tiny bit of water and pressing on gently. Here is the recipe and directions for the fondant:
 
2 cups miniature marshmallows
2 cups icing sugar
1 tbsp water
 
Place marshmallows and water in a microwave safe bowl. Microwave on high for one minute and stir well with a rubber spatula until no pieces of marshmallow remain. If you still see lumps, return to the microwave for another 30 seconds, repeating as necessary and stirring in between until the mixture is smooth.
Add icing sugar, stirring until mixture becomes stiff. You will likely still see some unincorporated sugar, that's fine. That will be incorporated in the next step.
 
Dust work surface with a good amount of icing sugar. This stuff is SUPER sticky. Pour/scrape mixture onto work surface, dust your hands with icing sugar, and knead until the fondant is no longer sticky and forms a smooth ball, adding icing sugar as needed. Be careful not to add too much or it will become difficult to roll out thinly.
Dust rolling pin with icing sugar, and roll out, turning fondant over and re-dusting surface with icing sugar frequently or it will stick and be a disaster. My test batch ended up stuck all over my kitchen counter because I didn't bother flipping or redusting. Not fun to clean.
When the fondant is rolled as thin as you like and big enough to cover your cake (I measured mine at 7" and added 2" for overhang). Use a pizza cutter or sharp paring knife to cut out your square.
Lift fondant (I used my rolling pin to drape it on so I didn't have to worry about tearing while I moved to where my cake was) and gently place on top of recently frosted cake (I frosted mine right before I started making the fondant). Smooth out the top and sides.
 
As I mentioned above, for the red squares I cut strawberry fruit by the foot into squares (for the big squares I cut two equal size pieces and used a dab of water to stick them together to form a square) and apply to cake by moistening the back of the squares and gently pressing onto fondant.
 
There you have it! I've never got so many compliments on a party as I did on this one, and it's probably one of the cheapest parties I've ever thrown, and by far the most fun!


Tuesday, April 8, 2014

Pumpkin Bread Pudding

I was invited to an impromptu dinner party this weekend and was asked to bring something along. Since I did not have much time I needed to whip something tasty up. And fast! 

A dessert I am fairly good at making is bread pudding. Its one of the first things I can recall making with my mom. Mostly just ripping bread up but I learned by watching. I believe that cooking with kids is very important and I am so happy that my mom did this with me. I learned through her and she was the one who gave me my cooking skills. Thank you mom! Love you! 


When bread at my house gets too stale to use or is going to go bad, I throw it into the freezer. No point in wasting it. This is a good way to use up all those random bread pieces floating around my freezer.

This bread pudding is loaded with pumpkin flavour and came out having the aroma of 
fresh baked pumpkin pie! 


Pumpkin Bread Pudding


About 5 cups of stale bread ripped into small pieces.
3 eggs
2 cups milk
1 small can of pumpkin puree
3 tsp pumpkin pie spice (more or less)
1 tsp cinnamon (more or less)
dash of salt
dash of vanilla


Place the bread chunks into a large baking dish. Mix the remaining ingredients into a large bowl until well blended. Pour on top of the bread then mix it all around until all the bread is coated. 
I like to use my hands and mush it up to make sure its all nice and even, but you do not have to. 

Bake for around 30-45 minutes or until set. 

Optional Glaze:
1 tsp pumpkin pie spice
1/4 cup icing sugar
a little water
Mix above with a little bit of water to make a thin glaze. Pour over bread pudding after it has baked.
Maple syrup is also great on here. Or, heck! Why not just use both like we did!


This part if a personal preference. I like to cut the entire thing into small squares then put on the glaze/syrup and then serve it. Others just scoop or cut a piece. Cutting it into small squares lets the glaze and/or maple syrup cover more, not just the top. It looks nicer on your plate too!

Do you have a recipe to share with us? Let us know on our Facebook Group!


By Mommy Melissa
 photo 3mommiessig_zps86cc38de.jpg


Tuesday, April 1, 2014

Fresh and Full of Flavour!

Here is a great meal idea that is light but filling. The only real guilty part would have to be the dipping sauces! These Vegetable Spring Rolls are bursting with crunchy vegetables and loads of flavour. 


I made these at my sisters house and since she had just thrown a birthday party for my niece (who wanted sushi of all things) she had a lot of fresh veggies and sticky rice left over. 
That made the prep time even less! 

Now first you will need to decide what you want to put in them. 
The options are really endless. If you do not use a meat it can even be vegetarian.
We chose to use a lot of veggies, rice and spicy tuna (canned tuna mixed with sriracha hot sauce).
The veggies were, cucumber slices, grated carrots, lettuce and avocado.

Then you will need your rice sheets, a large bowl of very hot water, and a tea towel. 

Place the rice sheet in the hot water for about 10-25 seconds. Remove and set on the tea towel. 
Place your ingredients in the middle.
Starting from the bottom, fold it up and over your veggies.
Next the sides over the veggies, as if you are making a pocket.
Now roll the bottom to the top and its done!

I will make a diagram to show off my impressive Microsoft Paint skills!


You see that? That is incredible if I do say so myself!

Now the Peanut Dipping Sauce!
Its the one in the middle of the picture 
Oh this stuff is good!

2 tbs crunchy peanut butter
2 tbs hoisin sauce
dash of soy sauce
dash of vegetable oil
1 clove of garlic, chopped as tiny as you can
a few shakes of hot sauce
3 tbs very hot water

Add everything together and mix. 
Keep mixing until it all comes together, it will, just keep stirring!
Dip away and enjoy it!

The other two sauces that I have included in the picture are a Red Thai Sauce by Heinz and a creamy sesame sauce called Wafu Sauce. They are both great with the rolls.


By Mommy Melissa
 photo 3mommiessig_zps86cc38de.jpg


Monday, March 31, 2014

Chopped Challenge Round 2 Results From You!


With our last weeks Chopped Challenge, we received a few photos from our Facebook Group members showing us their creativity using the mystery ingredients up front and center! 

Check out these tasty creations!


Pineapple Basil Bread Pudding
By Jennifer P.

"Bread pudding. Break up bread into small pieces. Mix small can of pineapple bits, condensed milk, 3 eggs, cinnamon, a few chopped basil leaves and a little milk! Place chopped bread in a buttered casserole dish. Pour mixture on top. Bake at 350 for 45 minutes."


Pineapple Basil Lasagna in a Creamy Pineapple Sauce 
Served with Pineapple Basil Baguette
By Debbie S.

"First cook the ground chicken in a pan with some pineapple. Add some bacon. sauce is made with flour butter condensed milk and regular milk. Chop some fresh basil and add to the sauce. To make the pasta I used 2 eggs, 2 cups of flour and 1 tablespoon pineapple juice. Mix until a ball is formed. Cut in four and roll on floured board. Cut in lasagna sized pieces. Cook for approx 5 mins Drain. In a pan add a layer of noodles then meat and sauce, repeat. sprinkle parm and a little more basil on top. bake in oven til heated through. serve with sliced baguette topped with melted butter pineapple juice and some basil"

Sweet and Spicy Balls
By James C.

"to make my meatballs mix all the following
ground beef, about 2 pounds
jalapeno pepper, chopped

bread crumbs made from a fresh baguette (cut it up and threw in the oven)
fresh basil leaves chopped up
crushed pineapple
2 eggs
pepper
Worcestershire
garlic salt
Blair's After Death Sauce

for the sauce mix all the following then cooked to just a boil
condensed milk
corn starch
pineapple juice from the crushed pineapple
white vinegar
soy sauce
Worcestershire sauce 
the remaining crushed pineapple
Blair's after death sauce 

Roll the meatballs and place in a casserole dish. Pour the sauce on top and bake for an hour on 350. It would have been better on rice."


Thank you all so much for participating! 
We hope to have even more to share with you with our next round!

What will YOU make with : 
Eggs, Sugar, Bananas, and Coffee!

Join our Facebook Group to keep up to date with us!


 photo 3mommiessig_zps86cc38de.jpg


Monday, March 10, 2014

Cheerio Breaded Shaped Tofu Nuggets

Tofu gets a bad rap. "Eww! Tofu, I am not eating that!" "Ugh how can you actually like tofu?". Honestly though, tofu is quite pleasing. It can take on what ever flavour you cook with. Marinading it overnight in a sauce, when you cook it, the taste will be completely incorporated into the tofu. 

With so many options are well of firmness, you can easily substitute tofu into meals easily. 
Tofu ranges from soft, medium, firm and extra firm. 
For some more info on tofu ranges, check out this link.
I like to generally work with firm.

I decided to make these with cookie cutters to make it a little more fun for my kids. 
How fun to have shaped food!? They love when I make them dino sandwiches, so why not 
heart shaped nuggets? Not to mention the endless possibilities of shapes!


Full Recipe at the bottom

Now I usually make tofu nuggets with Italian bread crumbs, but this time I wanted to try and make them a little more nutritious.

The first step is important. You need to press the liquid from the tofu. 
If you skip this, your nuggets will be mushy and not have a 'chicken' like texture.
Remove the tofu from the package and drain off any liquid.
Place a few paper towels on a plate. Now put the tofu block on.
Cover with more paper towel and a smaller plate on top of that.
This part you will need to find a large weight of some sort. 
I like to use cans.Stacking them up from larger to smaller.
Let it press for at least 15 minutes.

To make Cheerio crumbs, just place them into a large zipper seal bag with as much air out as possible.
With a rolling pin, crush them until a grainy powder is achieved. Pour onto a large plate.

To flavour your Cheerio breading, mix your favourite spices into the crumbs. 
I used ground cumin, pepper, powdered onion and a little garlic salt.

Once the tofu is pressed, slice it into half inch slices.
Take you cookie cutter of choice (I used a heart) and cut the shapes out. 

With any larger left overs you can use them as nuggets.
(Check out this soup to use your left over scrap pieces)

Crack an egg into a bowl and give it a good mix.
Dip each tofu nugget into the egg then into your Cheerio crumbs.
Place them onto a cookie sheet, making sure they have room between each one.

Bake in a preheated to 400° oven for 15 minutes. 
Flip them over and bake another 10 minutes.

Serve with your favourite dipping sauces. 
Our favourites here is spicy thai sauce, ranch dressing or dip-dip (aka ketchup)


Give tofu a chance and I really hope that you will not be disappointed. 


By Mommy Melissa
 photo 3mommiessig_zps86cc38de.jpg

Cheerio Breaded Shaped Tofu Nuggets

1 block firm tofu
1 cup Cheerios, crushed into a grainy powder
1 tsp ground cumin
1/2 tsp onion powder
1/4 tsp garlic salt
1/2 tsp pepper
1 egg, beaten

1.Press tofu between paper towel for at least 15 minutes.

2. Mix the crushed Cheerios with the remaining ingredients other than the egg.

3. Cut tofu into 1/2 inch slices then cut with cookie cutter.

4. Dip tofu nuggets into egg and cover completely. 

5. Dip into the Cheerios mix making sure everywhere has been covered.

6. Place on cookie sheet and bake at 400° for 15 minutes, flip, then bake another 10 minutes.

7. Serve with your favourite dipping sauces.


Saturday, March 1, 2014

Crock-pot Chili with Corn Bread Side

One of my all time favourite winter meals to warm up with is chili. I love to make it in the crock pot so all the flavors can meld together and make it even tastier. Cumin and chili powder are the usual spices I use to spice it up to have a nice taste, but use what ever is your go-to spices.


The skillet corn bread recipe I have been glued to now is by The Pioneer Woman. Its a new food to me, as it is not to big of a deal in Canada. Now that I have tried it, I do not think chili is complete with out it! Its so yummy and crumbles perfectly into chili. Oh gosh, you need to try it if you haven't already!

Here is my basic Crock-Pot Chili Recipe. It never turns out quite the same because I rarely put the same things in twice but this is always how it begins.

Basic Chili
1lb ground beef, cooked and drained (or ground chicken/turkey/pork, crumbled firm tofu, or nothing at all)
1 large onion, diced
2 cloves garlic, chopped fine
1 can diced tomatoes
1 can red kidney beans
1 can white kidney beans (I have replaced these with any other beans ie: chickpeas, pinto, lentils etc)
1 large can tomato sauce
2 cans of tomato soup
1 can sliced mushrooms, drained (or fresh if you have)
1.5 tbs ground cumin
1.5 tbs chili powder
salt and pepper
hot sauce to your spice level

optional ingredients I also like to add if they are on hand
1 chopped bell pepper (green, red, orange, yellow or mix them up)
2-3 stalks of celery, chopped
1 jalapeno pepper, seeds removed and chopped

Directions
Brown the ground beef in a fry pan along with the onion and garlic. Drain.

Place everything into the crock-pot and cook on high for at least 2 hours (low if you want to go longer)

Thats it! Now you can serve it along with this simple skillet corn bread recipe.

As said before its from The Pioneer Woman. Click here to check it out on her page.

Skillet Corn Bread by The Pioneer Woman


Ingredients
1 cup yellow cornmeal
1/2 cup all-purpose flour
1 tablespoon baking powder
1 teaspoon salt
1 cup buttermilk
1/2 cup milk
1 whole egg
1/2 teaspoon baking soda
1/4 cup plus 2 tablespoons shortening

Directions
Preheat the oven to 450 degrees F.

Combine the cornmeal, flour, baking powder and salt in a bowl. Stir together.

Measure the buttermilk and milk into a measuring cup and add the egg. Stir together with a fork. Add the baking soda and stir.

Pour the milk mixture into the dry ingredients. Stir with a fork until combined.

In a small bowl, melt 1/4 cup shortening in the microwave. Slowly add the melted shortening to the batter, stirring until just combined.


In a cast-iron skillet, melt the remaining 2 tablespoons shortening over medium heat. Pour the batter into the hot skillet. (The batter should sizzle.) Spread to even out the surface. Cook on the stovetop for 1 minute, and then transfer to the oven and bake until golden brown, 20 to 25 minutes. The edges should be crispy!


I really hope that you enjoy this easy Chili recipe and give it a try.


By Mommy Melissa
 photo 3mommiessig_zps86cc38de.jpg


Wednesday, February 26, 2014

Fresh Strawberry Muffins


My kids have been on a muffin craze the last few weeks. They love to eat foods they can pick up and without forks or spoons involved. I guess it faster to get the food into their mouths and floor, chew, swallow, then get back to causing havoc!! They are good at that. 

This yummy recipe was a shared link on Facebook that popped up one day on my news feed. It looked too good to pass and I just had to try and make them myself. 

The mix of sweet strawberry and the spice from the cinnamon are the perfect match to an afternoon tea. 

Right out of the oven!


Fresh Strawberry Muffins
1/2 cup butter, softened
3/4 cup sugar
1 egg
2 cups of flour
2 tsp baking powder
1/2 tsp salt
1/2 cup milk
1/2 tsp vanilla
1 1/2 cups chopped strawberries
3 tsp sugar
1/2 tsp cinnamon


Cream butter and sugar. Add egg and mix well.

Sift flour, baking powder, and salt in a small bowl. Add flour mixture and milk alternately to butter mixture. Add vanilla. Gently stir in strawberries.

Spoon batter into muffin pans.

Combine sugar and cinnamon and sprinkle over muffins.

Bake at 375º for 20-25 minutes.

Makes one dozen muffins.


Do you have a good muffin tin recipe you would like to share? Let us know on Facebook and it can be featured on our blog!

By Mommy Melissa
 photo 3mommiessig_zps86cc38de.jpg

Thursday, February 13, 2014

Homemade Oreos - Pinterest Challenge

Here is a perfect cookie to make loved ones this Valentines day! 


They are quite easy and incredibly tasty. This was a pin from the great website MyKitchenAddiction. This lady is insanely talented! 

Now lets talk cookies. Oeros are one of my favourite cookies, ever! So when this popped up, I knew it would be in the works soon. James even helped me make them (thats a big deal!)

The original recipe called for dutch cocoa powder. what the heck? there are more than one kind?! After a little research online, it turns out the difference between dutch and regular cocoa powder is the acidity between the two. Regular is more acidic and dutch is more alkaline. Dutch also has a more mellow taste and darker colour. I used regular and threw in a little baking soda to neutralize the acidity. Worked out fine.

Homemade Oreos 
(original pin here)
The Cookies!
Gather it up!
1 cup of unsalted butter, softened (I used margarine)
1 cup sugar
1 egg
1 tsp vanilla 
2 cups flour
3/4 cup of Dutch cocoa powder (or regular and a little baking soda)
1.5 tsp baking power
1 tsp salt

Work it!
Beat the butter and sugar on medium speed until its nice and fluffy. Then add the egg and vanilla until its all getting along together. 

In a separate bowl, add the flour, cocoa powder (baking soda if using), baking powder and salt. Using a whisk, mix it all together to make sure there are no more lumps (especially the cocoa powder) 

Cup by cup, add the flour mix to the wet ingredients and mix on lowest speed until there is no longer any flour mix left. 

Divide the dough into two and wrap in plastic wrap. Throw it in the fridge for at least an hour. This step is very important not to skip. The dough is very soft and needs to firm up a little. 

Line you cookie sheets with parchment paper and preheat oven to 350.

Once the dough has been cooled. Roll it out on a floured surface to about 1/4 inch thick. I found it very sticky and needed to use more flour than usual. To make them look more like real Oreos, use a circle cutter but that is boring! I used a heart for Valentines day aww sweet eh!? 

Place cookies on a cookie sheet. Since the cookies do not spread much you can put many on at one time just not too close. 

Bake them for about 12 minutes if you want them softer, 14 for a more crisp one. 

Cool them before icing. 

The Icing
Gather it up again!
1/2 cup butter, softened (margarine worked fine)
2 tbs half and half (who even has this? I used milk!)
1 tsp vanilla 
3-3.5 cups icing sugar 

Work it...again!
Mix the first three ingredients together until mixed. Then add the icing sugar about a half cup at a time (or you will be wearing more then you have in the bowl!)

Put in a piping bag, or if you are classy like me, a zipper seal bag with a hole cut in the corner, and pipe the icing onto a cookie. Place a second cookie on top and repeat with the rest of them.

Get a nice glass of milk and eat one, or four! Enjoy!

I loved these cookies and so did the kids and James too. These are added to my cookie recipe book and will be making them again soon with a new idea in mind. 
What if the filling was skipped. Add a little mint extract to the dough and dipped them in chocolate? Sounds like a Girl Guide Mint Cookie to me!

Do you have a favourite cookie recipe for us to try and feature on the blog? 
let us know in the comments or on our Facebook page or even the group


By Mommy Melissa
 photo 3mommiessig_zps86cc38de.jpg


Tuesday, November 12, 2013

Taquitos (With made-from-scratch flour tortillas)!

Yesterday morning, for some reason, I got to thinking about these little frozen taquitos I bought at the grocery store when I was pregnant. I could have eaten the entire box. So good. It just so happened that I had juuuust enough for the filling, but no tortillas. By this point, I was practically salivating over the prospect of fresh taquitos, so I decided to take matters into my own hands and make my own. I had doubts on how they would turn out (I was picturing crunchy, more like chips than wraps), but I figured if they don't work, chicken nachos! Anyways, they turned out wonderfully and I will never, ever, ever buy them from the store again. The recipes are as follows.
Flour Tortillas
(This recipe should make 8, but I made a couple bigger so I only got 7)
2 c. all purpose flour
1/2 tsp. salt
1/2 tsp. baking powder
3 tbsp. olive oil
3/4 c. boiling water
It's simple. Mix the dry ingredients in a large bowl, and stir in the wet. Use a spoon until the dough is cool enough to handle, then bring it together with your hands and turn onto a floured surface.
Knead until a smooth dough is formed. You may need to add a little more water or flour, I did not.
Let rest for 10 minutes, then separate into 8 balls and roll out as thin as possible. I rolled them as I went (as in rolled one ball and fried it, while it was frying I rolled another, etc etc)
Fry in a greased skillet over medium heat for about a minute per side. Smack down any big bubbles. Keep warm until ready to use!
Taquitos
8 tortillas
1/2 brick softened plain cream cheese
1/2 c. shredded cheddar
1/2 c. salsa
1 1/2 - 2c. shredded chicken
Hot sauce to taste (optional)
Preheat oven to 400. Line a cookie sheet with foil.
Mix all ingredients together and spread over tortillas.
Roll up tightly and place on cookie sheet seam side down.
Bake 15-20 minutes, serve with salsa and sour cream.
And there you go! So simple, so delicious, so addictive. I dare you to eat just one.

 By Mommy Jenn