Saturday, December 7, 2013

Make a Treat. Make a Difference!

This season Kellogg's has come out with this great idea for donating money to The Salvation Army this Christmas. The Make a Treat. Make a Difference is a fun and interactive way to have quality time with your family and help a less fortunate child at the same time. 

The way it works is you sculpt a 'toy' using Rice Krispie Treats. Take a photo of it, then upload it to RiceKrispies.ca. For each original photo uploaded, a new toy will be donated to The Salvation Army who will deliver it to a child in need! How wonderful!

While at my sisters house I noticed this on the box of cereal on the counter. Out came the marshmallows and butter and we got to work! I used the original Rice Krispies recipe found on the inside of the box, (click here to see it on their site) but also added about 1/2 cup of Spice cake mix (just the powder not the other called for ingredients). It gave them an extra seasonal taste that was totally delicious! Once it cooled a little, we buttered up our hands (so it doesn't stick to them) and got to work! Since my kids were at home with Daddy, it was just my sister, my nieces Annabelle and Madison, and myself doing this activity. My nephew was even gone out with his Daddy for a ride. A total girls activity!

It was so much fun watching them create their little masterpieces and decorating them with all the sprinkles and candy! Even my sister created something! If you know her then you know that's something!! 
(kidding Jennifer if you are reading this!!)  

Here are our Treat Works of Art!

Lalaloopsy By Madison and me

Caterpillar By Madison

Candy Cane by Annabelle

Christmas Tree by Madison

Snowman By Jennifer

Sleepy Kitty By Me

So now I am asking you to do the same. It wont take too long to do and plus, it gives a child a gift this Christmas! You even get to eat it after it has its photo shoot! Nice! 

Lets get to it everyone! Make those Rice Krispie works of art and share them on their webpage. Then a child will get a toy and that makes everyone happy! 


By Mommy Melissa

 photo 3mommiessig_zps86cc38de.jpg


Thursday, November 21, 2013

DIY Greek Yogurt


What comes to mind with Greek yogurt? Thick and creamy? Now what about regular yogurt? Thin and smooth? I like them both but I love the Greek style. The price is just so high though! While watching a cooking show (like I often do!) the chef made regular plain style yogurt into Greek style. I was impressed to say the least! I just wish I could remember who it was.... Anyways, I wanted to give it a try myself. So, I did! The results were wonderful! 

First you need to buy some plain yogurt, I bough Vanilla because I am a rebel like that sometimes!
Then some cheese cloth, Dollarama sells it for a buck in the kitchen section.
You also need a large bowl and a large sieve. 
If you do not have a large sieve like me, then you need some imaginative thinking.

First, drape the cheese cloth over the bowl as many times as you can with a lot overlapping the sides. 
The sides will be where it gets gathered at the top. 
Pour 4 cups of yogurt into middle of your cheese cloth.


Gather the sides up to the top and tie with a knot or a twist-tie.
Now if you have the sieve, place the cheese cloth into it and rest it over the large bowl. 
Just be sure that it does not touch the bottom. It must be higher so the liquid can drain out over time.
If you do not have that elusive large sieve, then get creative with it. 

I had to tie yarn around the cheese cloth then wrap it around my top shelf of the fridge and had the bowl underneath it. 

James, looked in the fridge later that night and just shook his head and asked what the heck I was doing. 
Meh, you know, making Greek yogurt, normal stuff. 

Now that you have that part rigged up and ready. Wait for at least 12 hours. uurrgghh waiting sucks!
Once that long wait is over, squeeze the cheese cloth gently to get the last bit of moisture out of it. 


Open it up and scoop out that glorious yummy goop! You will only get around 2 cups of it which is sad.
I was surprised to see how much liquid dripped out during that time!


My favourite way to eat it is with honey! mmm mmm mmm! 


What you need
4 cups plain yogurt (the higher the fat the thicker the results)
Cheese cloth
Twist tie
Large sieve
Large bowl

What to do
Place cheese cloth into bowl and drape over the sides, pour yogurt into the cloth and tie at the top.
Once tied put into a large sieve and balance over a large bowl making sure there is at least 2 inches between the bottom of the sieve and the bowl.
Let sit at least 12 hours.
Squeeze out any remaining liquid.
Open and serve.

Don't miss out on entering our November Tims Card Giveaway! Click here to leave a comment on the blog or here to leave a comment on our Facebook Page! Time is running out to enter.
Contest ends November 29th so hurry!

By Mommy Melissa

 photo 3mommiessig_zps86cc38de.jpg

Wednesday, November 20, 2013

Dreaming of Christmas

I was just browsing from Christmas decorations a few years ago. We are currently in the process of hanging up the decorations, trimming the trees and singing along to carols! I just love the Christmas season! It seems like everyone is celebrating really early this year, we had out annual county tree lighting ceremony last weekend, now the Santa parade this weekend! I love it. :) Pictures of my most recent decorations will be posted once all is done, as for now...Christmas past....


POST BY MOMMY OLIVIA

 photo 3mommiessig_zps86cc38de.jpg

Wednesday, November 13, 2013

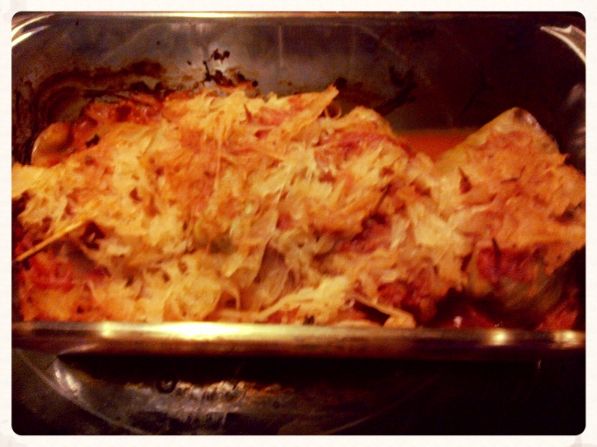
Cabbage Rolls with Sauerkraut

I found this recipe a few years ago and have fallen in love ever since! Although mine I did slightly different (I browned my meat and cooked the rice first, I only used the juice from the diced tomatoes, and instead of using tomato juice I used a no name tomato pasta sauce (and added a bit of water). The Sauerkraut mixed with the cabbage rolls give it a whole new flavour, it's so delicious!!! I suggest you all give it a try :)

What you will need:
- 1lb lean ground beef or pork
- 1 cup of uncooked rice (I cooked mine before mixing everything)
- 1 medium onion- chopped
- 1 clove garlic- minced
- 1/2 tsp pepper
- 1/2 tsp garlic powder
- 1 tsp salt
- 1 tsp paprika
- 1 can of tomato juice (I used 1 can of no name pasta sauce)
- 1 can (28 ounces) Sauerkraut
- 1 head of cabbage

Combine beef/pork, rice, onions, garlic,  pepper, garlic powder, salt and paprika in large bowl. (If you chose to cook your meat and rice first- cook them and then mix with rest of ingredients)

Steam heads of cabbage until leaves remove easily (about 5 minutes each in microwave along with 1/2 cup water, covered with plastic wrap works well) Take handfuls of meat mixture and roll up in cabbage leaves.

After covering the bottom of the pan, top with half of the sauerkraut and half of the tomatoes. Place rolls in roasting pan. Repeat with second layer. Pour tomato juice over top. Cover and bake 2 1/2 hours at 350 degrees. (If you have already cooked the rice and meat cook for 1 1/2- 2 hours)
 
This recipe came from HERE.

 photo 7061a22a-3152-4526-ae9f-f2e47159b8f9.jpg

POST BY MOMMY OLIVIA

 photo 3mommiessig_zps86cc38de.jpg

Tuesday, November 12, 2013

Taquitos (With made-from-scratch flour tortillas)!

Yesterday morning, for some reason, I got to thinking about these little frozen taquitos I bought at the grocery store when I was pregnant. I could have eaten the entire box. So good. It just so happened that I had juuuust enough for the filling, but no tortillas. By this point, I was practically salivating over the prospect of fresh taquitos, so I decided to take matters into my own hands and make my own. I had doubts on how they would turn out (I was picturing crunchy, more like chips than wraps), but I figured if they don't work, chicken nachos! Anyways, they turned out wonderfully and I will never, ever, ever buy them from the store again. The recipes are as follows.
Flour Tortillas
(This recipe should make 8, but I made a couple bigger so I only got 7)
2 c. all purpose flour
1/2 tsp. salt
1/2 tsp. baking powder
3 tbsp. olive oil
3/4 c. boiling water
It's simple. Mix the dry ingredients in a large bowl, and stir in the wet. Use a spoon until the dough is cool enough to handle, then bring it together with your hands and turn onto a floured surface.
Knead until a smooth dough is formed. You may need to add a little more water or flour, I did not.
Let rest for 10 minutes, then separate into 8 balls and roll out as thin as possible. I rolled them as I went (as in rolled one ball and fried it, while it was frying I rolled another, etc etc)
Fry in a greased skillet over medium heat for about a minute per side. Smack down any big bubbles. Keep warm until ready to use!
Taquitos
8 tortillas
1/2 brick softened plain cream cheese
1/2 c. shredded cheddar
1/2 c. salsa
1 1/2 - 2c. shredded chicken
Hot sauce to taste (optional)
Preheat oven to 400. Line a cookie sheet with foil.
Mix all ingredients together and spread over tortillas.
Roll up tightly and place on cookie sheet seam side down.
Bake 15-20 minutes, serve with salsa and sour cream.
And there you go! So simple, so delicious, so addictive. I dare you to eat just one.

 By Mommy Jenn
 

Monday, November 11, 2013

Running on Coffee - With Giveaway!


As three very busy moms, one of the most important things in our lives is coffee. It is a necessity. It just is!
The aroma, the warmth, the kick to get us going every day.

Did you know that coffee was first known in Europe as Arabian Wine? Or that the most expensive coffee known as Luwak Coffee or civet coffee, is made from mongoose poop?! Priced at $160 per pound!
For some more fun facts check out this link.

This is about right!

Here are the 3 Mommies Coffee Profile!


Now for the fun part! The Giveaway!

Leave us a comment telling us what your favourite kind of coffee is and you could have a chance to win a 

$5 gift card to Tim Horton's!


The draw will be on November 29th, 2013.

So lets hear your coffee talk, java lovers!

Even if you are not a coffee lover, leave us a comment with your favourite thing at Timmy's is, or warm drink, etc! 
We love to hear from you!


 photo 3mommiessig_zps86cc38de.jpg


Sunday, November 10, 2013

Drip-Free Jell-O Popsicle!

My children LOVE frozen treats! Freezies, icecream cones, popsicles anything frozen. I on the other hand can't stand the mess they leave behind. I wanted to find something that would freeze well but not make such a mess to clean up afterwards. 

My brilliant thought? To freeze Jell-O in ice pop moulds
to make a


All I did was make the Jell-O as directed then poured the mix into the ice pop containers. Froze them over night and voila! Orange flavoured Drip-Free Popsicles!

              
Yummy Orange!!
Look Mommy, No drips!

They were a hit with the kids the next day. Some ended up on the floor and couch, and kids but it fell like a clump of jelly. Not the usual pool of sticky liquid all over everything and everyone!
Quick clean up with a paper towel.


Don't forget to check back tomorrow for the November Giveaway!


By Mommy Melissa
 photo 3mommiessig_zps86cc38de.jpg

Saturday, November 9, 2013

Gingerbread Latte

Here is a festive warm drink to get you in the mood for the holiday season! 


Recipe for gingerbread syrup
1 1/2 c. water
1 c. white sugar
2 tsp. ground ginger
1/4 tsp. ground cinnamon
1/4 tsp. vanilla extract

1. Combine in pan. Bring to a boil, the reduce heat and simmer 20 minutes. 

2. Pour into container and cool.

To make Latte 
1 oz gingerbread syrup
2 oz espresso or very strong coffee
1/2 c. hot, frothed milk (I make mine by pouring the milk into a tupperware, putting the lid on, and shaking it like crazy. Then I remove the lid and microwave it in intervals until it's foamed up)
Sugar to taste
1/2 tsp cinnamon

1. Combine sugar, syrup, and espresso/coffee in cup.

2. Pour in hot milk, using spoon to hold back foam.

3. Dollop foam on top, and sprinkle with cinnamon.


                     Be sure to stay tuned for another giveaway coming soon! 

By Mommy Jenn

 photo 3mommiessig_zps86cc38de.jpg

Friday, November 8, 2013

Easy Barbeque Meatloaf

Here is my go-to meatloaf recipe that the entire family loves. It is quick to prepare as well as very moist and juicy. Using a BBQ sauce of your choice lets you vary the taste to your liking. My favourite to use is 
Bulls-Eye Guinness Barbeque Sauce. It has a smoky sweet taste. Another great sauce to use is 
PC Smokin' Stampede.


East Barbeque Meatloaf
2lb lean ground beef
1 pack Stuffing Mix for Chicken
1 cup water
2 eggs, beaten
1/2 cup BBQ Sauce (or ketchup), divided in half

1. Mix all together (except half the bbq sauce)
2. Shape into loaf shape and put into bake dish.
3. Spread the rest of the bbq sauce on top.
3. Bake for around 1 hour or until it cooked through.

I made extra tomato sauce to serve on top with just a can of tomato soup and some extra BBQ sauce.

What is your favourite BBQ sauce to use at home? 


Be sure to stay tuned for another giveaway coming soon! 


By Mommy Melissa

 photo 3mommiessig_zps86cc38de.jpg

Wednesday, November 6, 2013

Apple Carrot Cake with Pumpkin Spice Cream Cheese Frosting

Here is a quick cake idea I had come up with. Using the idea from a pineapple dump cake recipe, I decided to give it a shot! The end result was really tasty and perfect to finish off a meal in the fall. It has the flavours of autumn in it.

First I started by grating four large peeled apples. Then I poured a carrot cake mixture on top. Just the box of mix, not the other ingredients it called for. Once it was all mixed up I baked it for 40 minutes at 350.


While it was baking, I prepared the pumpkin spice cream cheese icing. (it tastes as good as it sounds!)


Mix them all together in a mixer and whip it until it is nice and fluffy. If you want to give it an extra pumpkin boost, pumpkin puree added would be amazing. I wanted to but there was none to be found that day.
Once the cake is out of the oven and cooled, ice it with the frosting then sprinkle with a little cinnamon for some pizzazz!

Here is the full recipe
1 box carrot cake mix
4 grated large apples, peeled
1 block of cream cheese, softened
3 cups icing sugar
1/2 tsp vanilla
1/2 tsp pumpkin pie spice
1 tbsp pumpkin puree (optional)
cinnamon to sprinkle on top

1. Mix the grated apples with the cake mix. Pour into baking dish.
2. Bake at 350 for around 30-40 minutes or until toothpick comes out clean.
3. Whip the remaining ingredients in a mixer until light and fluffy.
4. Spread the frosting over cooled cake. Sprinkle cinnamon on top.

Be sure to stay tuned for another giveaway coming soon! 

By Mommy Melissa

 photo 3mommiessig_zps86cc38de.jpg