Wednesday, April 30, 2014

Have a BLAST with a DIY Minecraft party!

DIY MINECRAFT PARTY


My oldest son, Tristan, recently turned 8 (!!!). His choice for party theme this year was Minecraft, which I knew he would pick and I was probably more excited about than he was. If you're unfamiliar with the game, which can be played on XBox, PS3 and PC, I call it "virtual lego". You can build almost anything your heart desires, as well as mine for gold and diamonds. There are some "bad guys" but as far as video games go, they're fairly tame and the game is not gory at all.
 
 
I'll start with the invites.
 
 
I googled a few Minecraft pictures, downloaded the Minecraft font from here and used a program on my computer called PrintProjects to put everything together. I then printed everything on standard printer paper, cut each section out, and glued them onto green construction paper, which was then glued onto a slightly bigger rectangle of black construction paper.
 
Onto my favorite part: Décor!
 
I thought it would be a cool idea to make some real life Minecraft blocks for the kids to build with. Turns out, I was right, and the kids had a blast (heh, I'm so punny) building towers and forts, and pretending to be creepers and blow them up. The blocks were time consuming, but super simple. Just sturdy cardboard boxes painted with brown and green paint. I could have made them look pixel-ly like in the game, but I wanted to save a little time and the kids didn't even notice.
 
 
For the torches, I unfolded two cereal boxes and cut them to the size I wanted, leaving the flaps on. Then I folded them into the shape you see above, stuffed them with crumpled newspaper to make them a little sturdier, and taped them together. I covered them with paper and painted them as you see in the picture. All together, the blocks and torches took me about 8 hours from start to finish.
 
The rest of the décor was comprised of balloons, streamers, and paper.
 
 
For the spiders, I used black balloons and 4 long pieces of black streamer that I taped to the balloon in the middle to look like legs. I colored two squares of paper red and taped those onto the large end of the balloon (I would have used construction paper but I had no red and didn't want to make yet another trip to the dollar store) and tacked the whole thing to the ceiling, using tape for the ends of the legs.
 
The creeper balloons are just green balloons with a creeper face drawn on with sharpie marker. Easy peasy.
 
 
My Enderman! Same concept as the spiders. Black balloon, purple rectangles (again, I had to color these because I had no purple construction paper) and streamers for his arms and legs.
 
 
I got so many compliments on the goody bags. I sharpied creeper faces onto plain green paper bags from Party Max. The candy all represents items found in Minecraft:
 
Gold = Butterscotch candy
Diamonds = Clear mints
Melon = Gummy watermelon
Rocks = Chocolate covered raisins
Redstone = Sour cherry balls
Fish = Gummy fish
 
The kids really enjoyed being able to choose what they wanted to take home!
(The labels were not finished in this picture, but my daughter just wrote the names on squares of paper. I wanted to make signs with the actual Minecraft pictures of the items, but I forgot to email them to my husband so alas, it didn't happen. No one cared except me!)
 
 
Some more Minecraft snacks. Cookies, TNT (Twizzlers cut in half and wrapped with paper that I sharpied TNT onto), pretzel "Sticks", watermelon, and cracker "Fish". There's also a veggie tray just out of view because I wanted to get at least some healthy food in there somewhere. Our main course was pizza cut into squares (everything is square in Minecraft), pasta salad, potato salad (there are potatoes in Minecraft too!), and devilled eggs (eggs are also found in Minecraft, so I'm told).
 
 
The Brewing Station. Again, I wanted to make an official Minecraft sign and potion chart for this, but see reason above for the lack of it. I taped construction paper creeper labels around the water bottles, and made Kool-Aid syrup that I then poured into labelled squeeze bottles. The kids had a blast experimenting with different flavor combinations. The recipe for the syrups is as follows:
 
2 cups white sugar
1 cup water
1 pack Kool-Aid (I used cherry, strawberry, tropical, lemon-lime, and grape)
 
In a medium pot, combine sugar and water. Bring to a boil.
Boil for one minute, stir in Kool-Aid powder, and remove from heat.
Pour into heat-safe container and allow to cool. Once cool, pour into squeeze bottles.
 
The recipe made enough to fill each bottle twice for me. Depending on the size of bottles you use, you could end up with more or less.
 
 
And finally, my masterpiece! Chocolate cake with chocolate frosting, topped with marshmallow fondant and the red squares are fruit by the foot cut to size and stuck on by moistening the back with a tiny bit of water and pressing on gently. Here is the recipe and directions for the fondant:
 
2 cups miniature marshmallows
2 cups icing sugar
1 tbsp water
 
Place marshmallows and water in a microwave safe bowl. Microwave on high for one minute and stir well with a rubber spatula until no pieces of marshmallow remain. If you still see lumps, return to the microwave for another 30 seconds, repeating as necessary and stirring in between until the mixture is smooth.
Add icing sugar, stirring until mixture becomes stiff. You will likely still see some unincorporated sugar, that's fine. That will be incorporated in the next step.
 
Dust work surface with a good amount of icing sugar. This stuff is SUPER sticky. Pour/scrape mixture onto work surface, dust your hands with icing sugar, and knead until the fondant is no longer sticky and forms a smooth ball, adding icing sugar as needed. Be careful not to add too much or it will become difficult to roll out thinly.
Dust rolling pin with icing sugar, and roll out, turning fondant over and re-dusting surface with icing sugar frequently or it will stick and be a disaster. My test batch ended up stuck all over my kitchen counter because I didn't bother flipping or redusting. Not fun to clean.
When the fondant is rolled as thin as you like and big enough to cover your cake (I measured mine at 7" and added 2" for overhang). Use a pizza cutter or sharp paring knife to cut out your square.
Lift fondant (I used my rolling pin to drape it on so I didn't have to worry about tearing while I moved to where my cake was) and gently place on top of recently frosted cake (I frosted mine right before I started making the fondant). Smooth out the top and sides.
 
As I mentioned above, for the red squares I cut strawberry fruit by the foot into squares (for the big squares I cut two equal size pieces and used a dab of water to stick them together to form a square) and apply to cake by moistening the back of the squares and gently pressing onto fondant.
 
There you have it! I've never got so many compliments on a party as I did on this one, and it's probably one of the cheapest parties I've ever thrown, and by far the most fun!


Thursday, April 17, 2014

Rolled Sugar Cookies with Royal Icing.

Since Easter is this weekend, I wanted to share with you a wonder sugar cookie recipe.
 It is perfect to use when making shaped cookies to decorate. It holds its shape when baked which is at times hard to find with some sugar cookies. 
I just love making a batch of cute little bunny shaped cookies and have them come out of the oven looking like scary blobs of terror!
I also wanted to give a try at making Royal Icing for the first time! 
It sounds scarier then it is to make it. I was quite surprised at how easy it actually was to make!

Before they are baked

Right out of the oven!
See how they hold their shape!
I have to say thank you to Mommy Jenn for suggesting this cookie recipe to me. 
Thank you!

The sugar cookie recipe is by Alton Brown. I love that guy! 
You will need:
 Flour, baking powder, salt, butter, sugar, egg, milk, and some icing sugar.

If you have all these ingredients, head on over to this link for the full recipe on The Cooking Channel


Now for the Royal Icing, like I said, sounds scarier than it really is. 
You do need to have a mixer though. Having to whisk it by hand would be a heck of a job!
The hardest part was finding meringue powder for a decent price! 
I ended up finding a local bulk shop that sold it by the tablespoon!
Royal icing is a type of frosting that hardens as it dries. 
It is perfect for shaped sugar cookies, especially if you will be moving them or packaging them.
Check out the steps here  at A Spoonful of Flavor, for full details and recipe for royal icing.

From this 
To this!!
    
Here is another picture of my beautiful carrot cookies!!


Are you making any special Easter-y treats this week? Share them with us on our Facebook Group!


By Mommy Melissa
 photo 3mommiessig_zps86cc38de.jpg


Wednesday, April 16, 2014

Chopped Challenge: Round 3


Here are our results for week threes Chopped 3 Mommies Style.
Mystery ingredients for this round were:
Coffee, Banana, Sugar, Egg.
Two of us mommies had the same idea to make a coffee flavoured syrup to complete our dishes! 
We all created a dessert! Check them all out below.


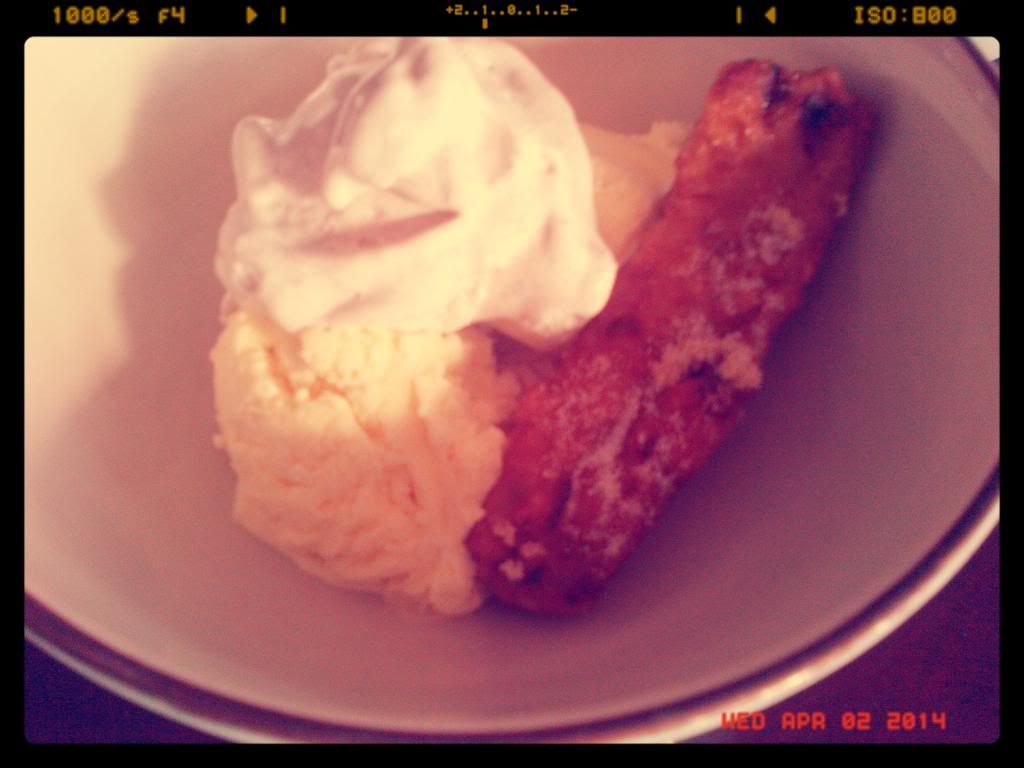
Chef Olivia: Elevated Banana Split: With Deep-Fried Bananas and Coffee Whipped Topping

 photo 0a1f5b73-3bc3-4946-93ad-f8587e4f99eb.jpg


For the deep-fried banana:
- 1 Banana
- 2 tbsp milk
- 1 tsp oil + extra oil for frying
- 1 tbsp sugar
- 1 egg
- 2 tsp flour

For the Whipped topping:
- 3 tbsp cool whip
- 1 tsp of coffee
- 1/2 tsp cinnamon

Deep-Fried Banana:
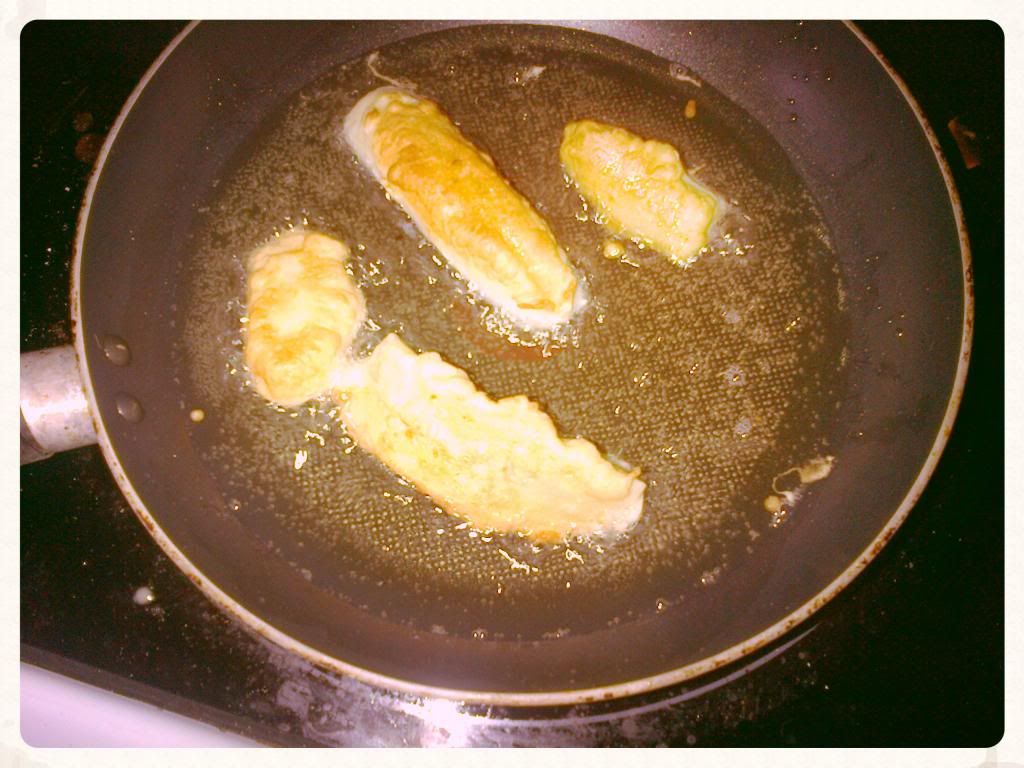
Heat a small sauce pan with the bottom covered in oil on medium high heat. In a mixing bowl beat the milk, egg and oil for about a minute, then mix in the flour and sugar until smooth. Slice a banana right down the middle and dip in the batter, fry in pan turning the banana until all sides are golden brown (about 6 minutes total) Sprinkle with sugar when they are done.

 photo f473213a-4e88-418a-bed6-a5c80fb78f2e.jpg


Whipped topping:
Mix all ingredients together until combined.

Then serve all components in a bowl (ice cream first) and top with a pile of the whipped topping.

 photo 2f874f28-bc99-4966-8f0c-d7c75c5cc98f.jpg

The bananas might not look like the most appetizing thing in the entire world, but this dish was surprisingly good. I love the combination of the warm banana and the cold ice-cream and the whipped topping, they all came together like a harmony. If you have a toddler at home, make them this they will fall in love I promise!


Chef Melissa: German Pancake with Bananas Topped with Coffee Syrup

To make the German Pancake:
3 eggs
1/2 cup milk
2 tsp vanilla
dash of salt
1/2 cup flour
dash of cinnamon
1 large spoonful of butter
Mix the first four ingredients together with a whisk then add the flour and cinnamon. While you do that, put the butter into a bake dish and place in the oven at 450. Once it melts, pour in your batter. Bake for about 15 minutes. 
It puff up all crazy like. Once you take it out of the oven, it flops down so do not worry.

To make the Banana topping:
Slice up 2 1/2 bananas (give the other half to the toddlers attacking your leg for a 'nanas') place in a fry pan over medium heat and sprinkle some white sugar on top. Cook for about 3-5 minutes or until they mush up and smell like campfire bananas. 

To make the coffee syrup:
1/2 cup very strong brewed coffee
1/2 cup of white sugar
Splash of vanilla extract
Place them in a pot and bring to a boil over med-high heat. When it boils, lower to a simmer for around a half hour or until its nice and thick. Add a splash of vanilla extract at the end to bring all the flavours together. 

Spread the bananas onto the pancake then drizzle with the coffee syrup and serve. 

It was incredible! I will make this over and over again for sure! The German Pancake seems like it will be very welcoming to many different flavours. Imagine cinnamon and a little lemon juice? Or Nutella and banana?! Oh My!!


Chef Jenn: Banana Pudding with Coffee Syrup

For this weeks chopped, we kept it simple. Sometimes the simplest ingredients make the most delicious dish, and this one proved that theory to me. Creamy vanilla pudding, ripe bananas, and a sweet coffee syrup come together to make a rich, layered dessert. Here's my twist on an old classic.

For the Pudding:

1 cup sugar
3 eggs, beaten
A dash of salt
2 tbsp cornstarch
2 cups milk
1 tsp vanilla

1. Mix together sugar and eggs in large bowl. Add salt, cornstarch, and milk.

2. Pour into a pot and bring to a boil over medium high heat, stirring constantly. Cook until thickened.

3. Remove from heat, add vanilla and stir well.

4. Chill in airtight container in fridge.


For the Syrup:

2 cups coffee
2 cups sugar

1. Combine sugar and coffee in a pot and bring to a boil, stirring constantly to dissolve sugar.

2. Lower heat and simmer until it has reached your desired thickness (it took about 20 minutes for me, but this is variable depending on temperature used and how thick/thin you want your syrup)

3. Remove from heat and allow to cool in pot, then pour into container (I used a mason jar) and store in the fridge.

Assembly:

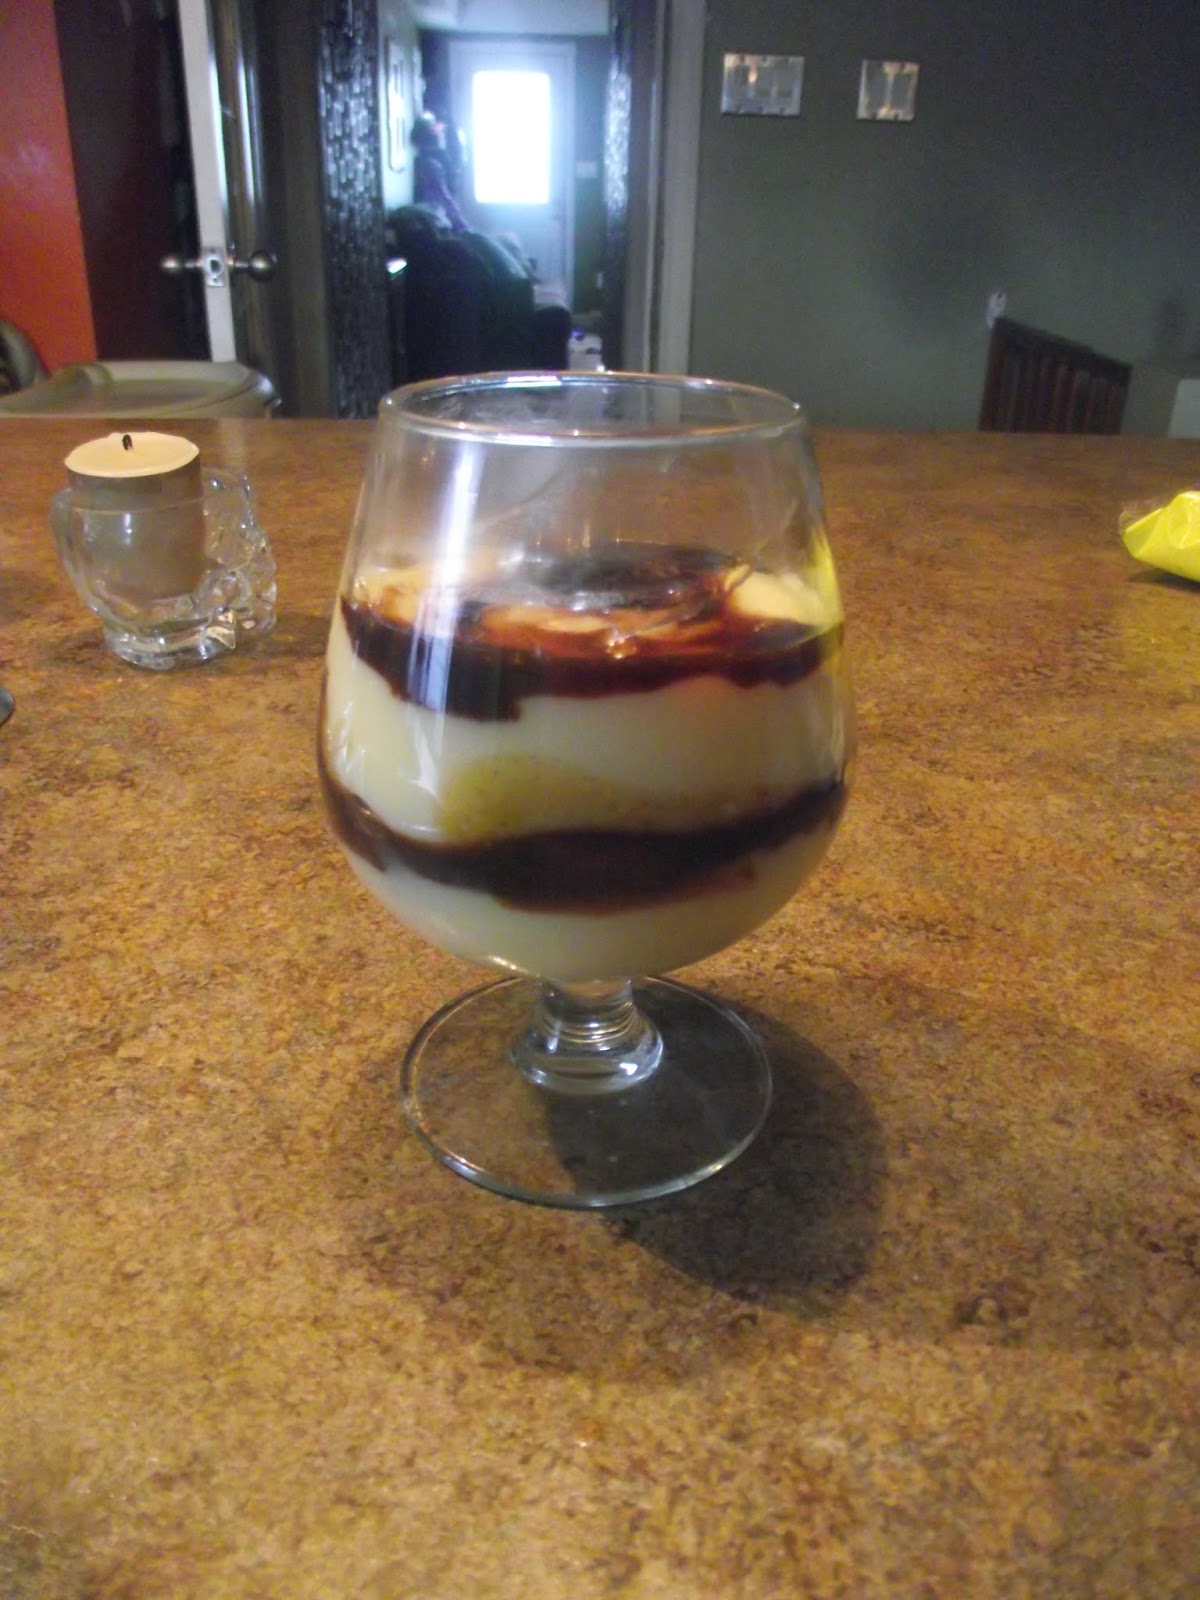
Once pudding and syrup are chilled, slice bananas. Layer pudding, then bananas, then syrup twice over in serving dish. I wish I could have found my glass ice cream bowls but alas, I could not. So I used a brandy glass because I'm creative like that. Top with a dollop of whipped cream if desired, and serve!


This round was a very sweet and flavourful round!
What would you create with coffee, bananas, sugar and eggs?

Show us on our Facebook Page and we feature it on our blog!

 photo 3mommiessig_zps86cc38de.jpg


Thursday, April 10, 2014

Strawberry-Banana Muffins

I've been experimenting with baking using whole wheat flour recently. With that in mind, I wanted to create something that was not only healthier than typical baked goods, but also yummy. I will say this right off the bat, these muffins are not SUPER healthy; there is a cup of brown sugar and half of the flour is regular all purpose, but there is plenty of fruit and the whole wheat flour so you don't have to feel totally guilty about scarfing one (or two) for breakfast or a snack. 

I noticed a few differences between my standard white flour muffins and these. One, these do not puff up as much. And two, they are considerably denser. This is because of the whole wheat flour. Also, they stick to the liners so if you don't use them, make sure you spray your muffin tins liberally with cooking spray. 

They passed the kids taste test though, so that's good enough for me.

Strawberry-Banana Muffins
(makes 12)

1 cup whole wheat flour
1 cup all purpose flour
1 cup brown sugar
1 tsp baking soda
1 tsp cinnamon
Pinch of salt
2 eggs
1 tsp vanilla extract
3/4 cup apple sauce
1 cup fresh or frozen banana chunks
1 cup fresh or frozen strawberries

The cast of characters:


1. If you're using frozen fruit, you will need to thaw it first. When that's done (or not, if you're using fresh), throw it in a blender and pulse until puréed. Set aside.

2. Preheat oven to 375. Line muffin tins with paper liners or spray tins with cooking spray.

3. Combine flours, baking soda, cinnamon, and salt in a large bowl. 

4. Add eggs, vanilla, sugar, apple sauce and vanilla extract. Mix on low until combined (or hand mix) 

5. Fill muffin tins/liners about 3/4 of the way full, and bake for 20 minutes or until toothpick comes out clean. Allow to cool completely on a rack.


Mommy Jenn
 photo 3mommiessig_zps86cc38de.jpg

Wednesday, April 9, 2014

Easy Ham and Egg Omelet Sandwich

This easy breakfast sandwich is super simple and quick to prepare. If you had ham for dinner the night before, this is a perfect way to use up any left overs. 


Easy Ham and Egg Omelet Sandwiches:
6 eggs, beaten
cooked ham, cut into cubes
peppers, chopped
onion, finely chopped
salt and pepper
dash of water or milk
Toast, 2 per sandwich you are making
Slice of cheese, 1 per sandwich

Ketchup, optional (you cannot have eggs without ketchup in this house!)


Line a square casserole dish with parchment paper,
leaving extra hanging over the sides
Place the ham, pepper and onion into the dish, on top of the parchment paper.
In a bowl, beat the eggs with a little milk or water and season with salt and pepper.
Pour over the ham, peppers and onions.


Bake until the eggs are fully cooked. About 30 minutes.
Remove from oven and let cool a few minutes.
Loosen edges with a knife then pull the side flaps of parchment paper up to remove the entire omelet.
Slice into squares the size of bread.
Place a slice of cheese on a piece of toast, then an egg square, a dash of ketchup then another toast and Voila! Breakfast is served!


Using this method you can come up with so many omelet possibilities. Broccoli and cheddar cheese, tomato and basil, mushrooms and sausage. Anything you can think of! 


What do you think of when you think of breakfast foods? Do you have any great ideas to help busy moms and dads get hungry bellies full? Give us a shout on our Facebook Page! 


By Mommy Melissa
 photo 3mommiessig_zps86cc38de.jpg

Tuesday, April 8, 2014

Pumpkin Bread Pudding

I was invited to an impromptu dinner party this weekend and was asked to bring something along. Since I did not have much time I needed to whip something tasty up. And fast! 

A dessert I am fairly good at making is bread pudding. Its one of the first things I can recall making with my mom. Mostly just ripping bread up but I learned by watching. I believe that cooking with kids is very important and I am so happy that my mom did this with me. I learned through her and she was the one who gave me my cooking skills. Thank you mom! Love you! 


When bread at my house gets too stale to use or is going to go bad, I throw it into the freezer. No point in wasting it. This is a good way to use up all those random bread pieces floating around my freezer.

This bread pudding is loaded with pumpkin flavour and came out having the aroma of 
fresh baked pumpkin pie! 


Pumpkin Bread Pudding


About 5 cups of stale bread ripped into small pieces.
3 eggs
2 cups milk
1 small can of pumpkin puree
3 tsp pumpkin pie spice (more or less)
1 tsp cinnamon (more or less)
dash of salt
dash of vanilla


Place the bread chunks into a large baking dish. Mix the remaining ingredients into a large bowl until well blended. Pour on top of the bread then mix it all around until all the bread is coated. 
I like to use my hands and mush it up to make sure its all nice and even, but you do not have to. 

Bake for around 30-45 minutes or until set. 

Optional Glaze:
1 tsp pumpkin pie spice
1/4 cup icing sugar
a little water
Mix above with a little bit of water to make a thin glaze. Pour over bread pudding after it has baked.
Maple syrup is also great on here. Or, heck! Why not just use both like we did!


This part if a personal preference. I like to cut the entire thing into small squares then put on the glaze/syrup and then serve it. Others just scoop or cut a piece. Cutting it into small squares lets the glaze and/or maple syrup cover more, not just the top. It looks nicer on your plate too!

Do you have a recipe to share with us? Let us know on our Facebook Group!


By Mommy Melissa
 photo 3mommiessig_zps86cc38de.jpg


Monday, April 7, 2014

Easter Crafting

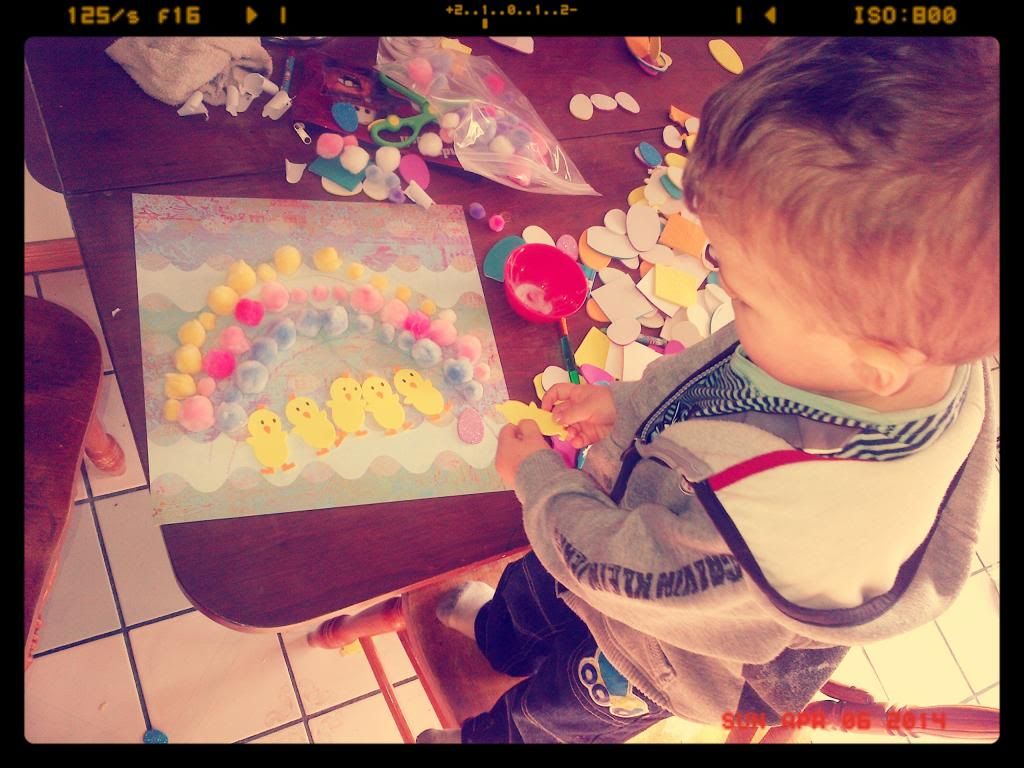
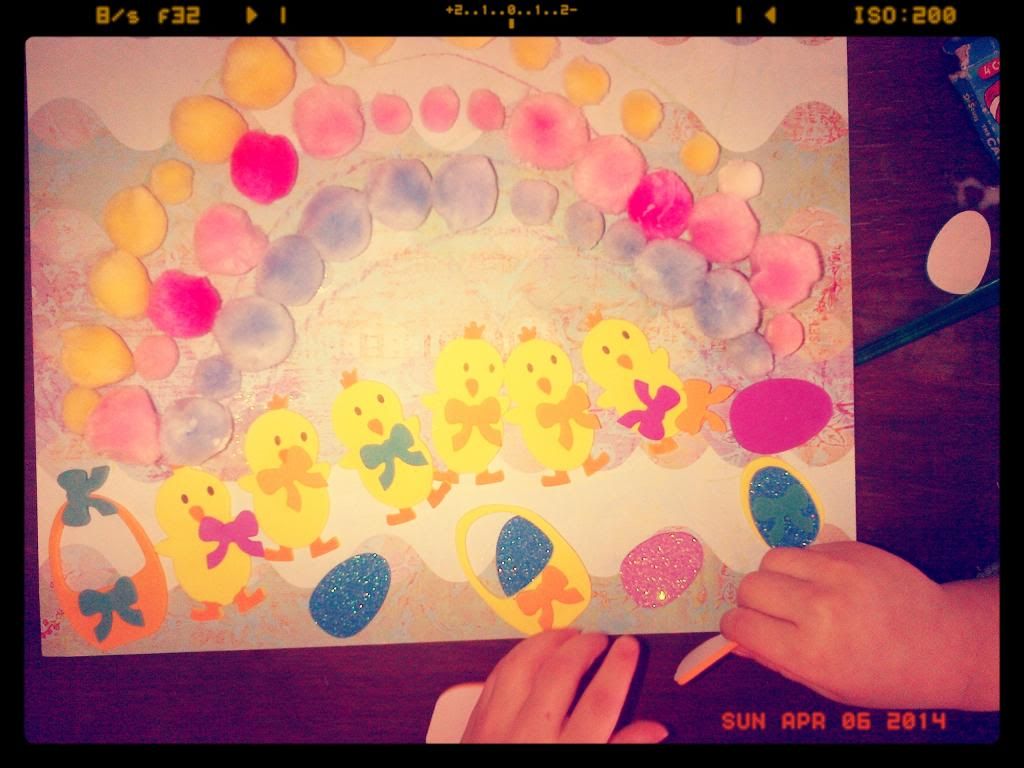
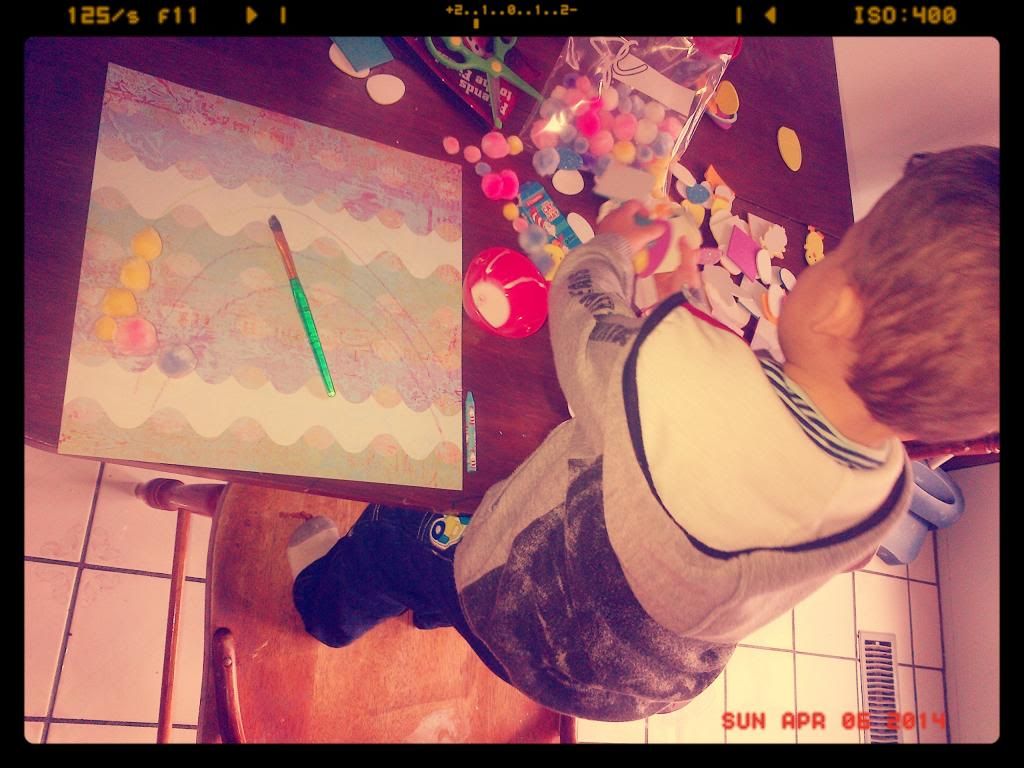
I am always looking for new crafting ideas for me an Noah to do together. Nothing beats the gorgeous artwork that covers my fridge. So of course with the beautiful Easter holiday coming up, why not do something that's fun and colourful to capture the essence of spring?

 photo 7a8dca37-1b7f-4e50-86f7-363c65de37db.jpg

 photo 8c592a35-749d-4cf9-97c4-e32a77564491.jpg

 photo 0a3177a0-8693-40c8-8f51-cfc27e0b3b4a.jpg

We would love to see your Easter ideas! Visit our facebook page and post! :)

POST BY MOMMY OLIVIA

 photo 3mommiessig_zps86cc38de.jpg

Sunday, April 6, 2014

Chicken Salad Melt

 photo 7d4d5148-9ad3-4478-b22b-afc5b49fa5c2.jpg


What you will need:
- 1 grilled boneless skinless chicken breast- cut into chunks
- 1/4 diced red pepper
- 1/2 small onion- diced
- 1 1/2 tbsp. of light mayo
- 1/2 tomato diced
- shredded parmesan cheese
- shredded Asiago cheese
- salt and pepper to taste
- dash of tobasco or hot sauce
- 1 whole wheat pita

Preheat oven to 350. Mix everything together in a bowl (except the pita and cheeses). Pile you mixture on top of the pita evenly, then sprinkle a desired amount of the parmesean and asiago cheese on top. Place on baking sheet and bake for about 7 mins, or until crispy.

Enjoy!

POST BY MOMMY OLIVIA

 photo 3mommiessig_zps86cc38de.jpg

Wednesday, April 2, 2014

Monthly Feature: Cheap and Easy Chili, by Jules


 photo 5181426c-7675-41a3-ac70-1a9b5b6527b7.jpg

I always make my chili recipe when there’s not much left in the house before I buy groceries. All the ingredients in my chili are all things I always have in my pantry but never really seem to use, unless I’m making chili of course. If you do need to buy the ingredients to make this recipe it’s not much more than 10$ for a large pot. When people think of chili they think of le...tting it sit in the crock pot all day, but I make mine rite in a large soup pot. This process takes about 20 mins and you still get the savoury taste of letting it sit all day. ENJOY!

Ingredients
1 lb of ground beef (I’ve also used chicken or pork or turkey)
1 can of diced tomatoes
1 can of whole kernel corn
1 can of mixed beans (I get “6 bean mix” from Walmart for less than a $1)
1 green pepper (or any color you have)
1 clove of garlic (you can use garlic salt or powder if you don’t have fresh garlic)
1 small onion (or onion salt or powder)
1 or 2 celery stalks
And chili powder to taste


Directions
To make the chili, I start off with browning the beef right in my soup pot. While the meat is cooking I chop my vegetables. Once browned I add the onion, garlic, celery and pepper and cook them up with the beef to give the beef a nice flavour. Once I’ve cooked the vegetables for about 5 min I open my can of tomatoes, and pour it in. (I do not drain my tomatoes as it gives the chili a little bit of liquid) at this point is when I start adding my chili powder. I let it cook stirring occasionally until the tomatoes are pretty well dissolved which is about 10 minutes. After that’s done, the chili is pretty well done, I add the corn (drained) and the beans (drained) I let it sit for a couple more minutes until the corn and beans are heated through, then we enjoy!

Assuming you need to purchase these items, they normally run very cheap. I can get almost all the ingredients for less than $1 at my small town grocery store, you may save even more if you’re able to shop around.


 Beef 3$
Tomatoes .99$
Canned corn >.99$
Canned beans .99$
Pepper .99$
Fresh garlic .99$
Onion .99$
Celery 2$
Chili powder 2$


This recipe came from Jules L.

Thank you Jules for this delicious chili recipe! We encourage all of our readers to participate with us, visit our Facebook page to post an recipes/crafts/toddler fun ideas you have! :)