Friday, November 1, 2013

Super Easy Caramel Apples!

Nothing says Fall like fresh apples. And nothing says YUM like dipping those apples in melted, gooey caramel. Every year I make treats to send in for the kids classmates on Halloween, and this year I decided on caramel apples. But I'm a little lot short on time and already had a box to paint to look like a Minecraft zombie head, so I didn't want to make the caramel from scratch (although I do have a very good caramel recipe written down somewhere). This recipe is super simple and virtually fool proof. Here it is!
 
Start with your apples. I had to use 47 of them.

 
After I took this picture, I twisted off every stem and inserted popsicle sticks. After doing about 10 of them I started stabbing them with a knife and then putting the sticks in. Much easier.
 
I'll apologize in advance because I forgot to take any pictures until I was done. I made these at about 2am and really just wanted to go to bed.
 
Now for the caramel. I used 9 180g bags of those individually wrapped chewy caramel squares. 3 bags did 12-15 apples. If you have kids making these with you, get them to unwrap the caramel. It's tedious and boring and I swear they glue those suckers closed.
 
Once you have your 3 bags unwrapped, dump them into a microwave safe bowl, along with 2 tbsp of water. Microwave for one minute; stir. Microwave another minute; stir. Do that one more time, and you should be all melted and ready to go!
 
Now you just swirl away! You could roll in virtually any toppings you want at this point, but I decided to skip it for the sake of getting at least a few hours of sleep. I like sleep. After coating each apple, scrape the bottom with a spoon (a lot of caramel will pool here) and place it on a square of wax paper. I found the paper made it a lot easier to put the apples into cellophane bags.
 
If you are bagging them, do not put them in the fridge! They will weep and we don't want that. Bagged up at room temperature, they should keep about a week depending on the freshness of the apple. Roughly the same time in the fridge, too.
 
There you go! These really couldn't be any easier... or yummier! Enjoy :)


Thursday, October 31, 2013

HAPPY HALLOWEEN!

It's finally here! And I must say I have been snacking on junk all day long, and the day is only have way through! I can't wait until tonight to see Noah go trick-or-treating for the first time, last night I threw a little Halloween party for him- I'm pretty sure he had the time of his life. Here are just some pictures from our evening, the costumes were great!!!


Have a safe night everyone :)

POST BY MOMMY OLIVIA

 photo 3mommiessig_zps86cc38de.jpg


Thursday, October 24, 2013

Country Apple Dumpling - Pinterest Challenge


I am on an apple roll again! Here is a Pin that needs to be shared with everyone you know! This has come to be one of my favourite desserts. It is THAT good! Crisp and gooey all packed into a perfect little dumpling.

Here it is! Or check out the Pin I used here 
1 can crescent rolls
1 large peeled apple, cut into 8 wedges with the core removed
1/2 cup butter
1/2 cup sugar
1/2 tsp cinnamon
1 cup Sprite (or Mountain Dew)

1. Roll each apple slice in a crescent roll, starting at the smaller end. Be sure to close up the ends. Place in bake dish.
2. Melt the butter and sugar in a small pot. Add the cinnamon.
3. Pour the butter mixture over the apple dumplings covering them all over.
4. Pour the Sprite in. I sprinkled some extra cinnamon on top too.
5. Bake at 350 for 40 minutes or until golden brown and bubbly.
6. Serve as is or with some ice cream.

Start with the pointed end of the crescent roll.
Line 'em up in a baking dish.
Pour the butter mixture over top.
Pour in the Sprite (or Mountain Dew)


Bake them till they are golden masterpieces!

By Mommy Melissa

 photo 3mommiessig_zps86cc38de.jpg

Wednesday, October 23, 2013

Logan the Little Artist

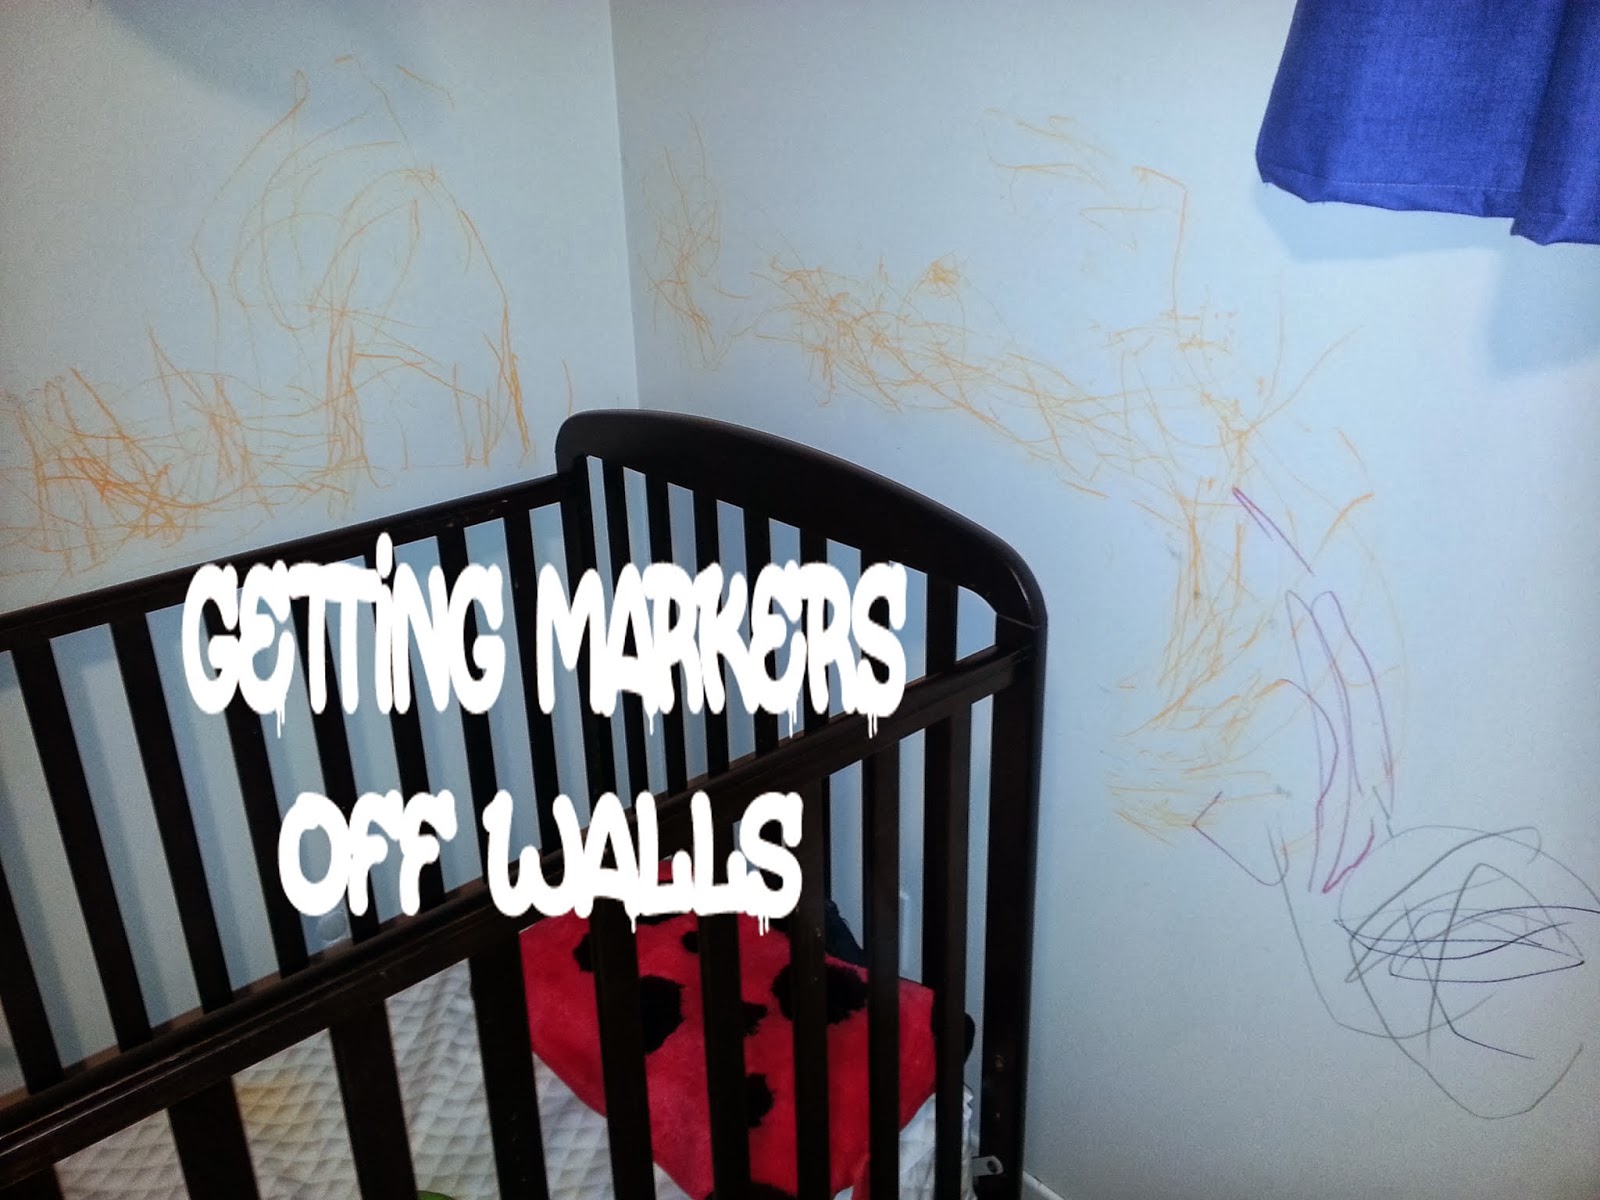
My two year old son is an artist. His favourite medium to work with? Well that would have to be Sharpie markers and white walls! He even dabbled a bit with a gold marker on my counter top!
First of all I would like to say that I have no freaking idea where he found them! I keep them on my book shelf way out of reach. But one morning he hopped out of his crib and started his masterpiece!
After trying to wash it with a dish cloth and dish soap, nothing came off. I asked the great and powerful Google what to do. There were people with all different ideas from nail polish remove, disinfectant wipes, hand sanitizer, alcohol, acetone, and magic eraser.


Nail polish remover, nothing.
Disinfectant wipes, nothing.
Hand sanitizer, nothing.
At this point I was getting worried.
Alcohol, nothing.
Acetone, what the heck is that? Skipped that one!
Magic eraser. I had to go to the store to buy it because I did not have one! But am I glad I did! That thing worked wonders! Took it off no problem! The walls took a bit more effort but in the end it all came off.

Look its all gone!!


The power of the eraser!!

I am just so thankful to have gotten it off the walls! The moral of the story? I need to buy more magic eraser and keep my budding artist away from markers!!

Have your kids done anything like this? Tell us your story, we would love to hear it!

By Mommy Melissa

 photo 3mommiessig_zps86cc38de.jpg


Tuesday, October 22, 2013

Quinoa Cookies - Monthly Feature

Here is a monthly feature by the one and only Sarah S! She always has great recipes to share with us at 3 Mommies and Friends! Thank you Sarah for another great post! 


Ingredients: 
1 cup cooked quinoa, 
1 cup 100% rolled oats OR uncooked quinoa flakes, 
1 cup unsweetened shredded coconut, 
4 large bananas, 
1 tsp vanilla, 
1/2 cup coconut sugar, 
1/2 cup unsweetened chocolate chips (or raisins, walnuts, or any ingredient you want), 
pinch of sea salt
.
Directions: 
Pre heat oven to 375. 
In a large mixing bowling, mash bananas, add vanilla, coconut sugar, quinoa, oatmeal,coconut and a salt. 
Mix well until combined. Stir in chocolate chips (or whatever you're using). 
Line baking sheet with parchment paper and drop batter onto cooking sheet. 
Bake for 25-30 min, remove, let cool and enjoy! 

Switch up: add 1/4 cup cocoa powder to turn into double chocolate chip quinoa cookies.

I didn't put chocolate chips in them because I forgot, but I think it would have tasted amazing with them! Make sure you grease the sheet because I didn't and they stuck a lot haha. But anyways enjoy!!


Thank you again Sarah! They sure look tasty!

 photo 3mommiessig_zps86cc38de.jpg

Monday, October 21, 2013

Onion Soup Au Gratin


This is my all time comfort food. Especially on a cold day. Perfect paired with a light main dish or a stand alone light meal. It is filling and very flavourful. 

It may seem like this is a difficult soup to pull off, but it can be very simple. There are a few more traditional ways to make this soup but this one is super simple. 

You want your onions to look like this
Place bread on soup then cover with grated cheese


 Onion Soup Au Gratin

5 onions, sliced semi thin
3 cups of beef stock
1/4 tsp dried basil
1 bay leaf
pepper, to taste
enough crusty bread to cover the top of two bowls
about 1 cup of mozzarella cheese, more or less

1. Bring the beef stock to a boil. Add onions, basil, bay leaf and pepper.
2. Simmer until onions are soft.
3. Ladle into onion soup bowls. Add bread to the top then cover with cheese. Sprinkle with a bit extra basil.
4. Broil until cheese is bubbly and golden.
*Be careful the handles are very hot!

Hope you try this out and love it!

By Mommy Melissa

 photo 3mommiessig_zps86cc38de.jpg

Sunday, October 20, 2013

Last Halloween

Since last year was Amelia's first and Logan's second Halloween, we only went to the shopping mall where they hand out candies at the shops to the children. Along with my nieces, Annabelle and Madison, as well as my nephew Jaxson, we had a good time. Our children were too young for candy, so mommy and daddy got to eat it!

Here are the children all decked out in their Halloween attire!


By Mommy Melissa

 photo 3mommiessig_zps86cc38de.jpg