Showing posts with label autumn. Show all posts

Saturday, September 27, 2014

Halloween is Coming!

Halloween is just around the corner! This year, as we have moved to a warmer area,  I am hoping that there will be no need to bundle the kids up under their costumes with winter jackets and snow pants!

I have been asking the kids what they wanted to dress up as to trick-or-treating and so far pirate has taken the spot light. Mostly with Amelia. She loves pirates! Yo ho ho, matey! Thats what she says when she sees a boat or anything nautical related. Logan has said Raph form TMNT as well as a banana. That boy has an imagination I tell you!

I think pirates! That may be what I will make them both (and mommy too!) to go out for halloween. I love dressing up too with the kids! You are never too old!

Here are a few ideas that I have come across as idea references for costume ideas.


What are you dressing your little ones up (or yourself!) as for All Hallows Eve this year?
Share a photo or idea with us on our Facebook page! 


By Mommy Melissa

Tuesday, April 8, 2014

Pumpkin Bread Pudding

I was invited to an impromptu dinner party this weekend and was asked to bring something along. Since I did not have much time I needed to whip something tasty up. And fast! 

A dessert I am fairly good at making is bread pudding. Its one of the first things I can recall making with my mom. Mostly just ripping bread up but I learned by watching. I believe that cooking with kids is very important and I am so happy that my mom did this with me. I learned through her and she was the one who gave me my cooking skills. Thank you mom! Love you! 


When bread at my house gets too stale to use or is going to go bad, I throw it into the freezer. No point in wasting it. This is a good way to use up all those random bread pieces floating around my freezer.

This bread pudding is loaded with pumpkin flavour and came out having the aroma of 
fresh baked pumpkin pie! 


Pumpkin Bread Pudding


About 5 cups of stale bread ripped into small pieces.
3 eggs
2 cups milk
1 small can of pumpkin puree
3 tsp pumpkin pie spice (more or less)
1 tsp cinnamon (more or less)
dash of salt
dash of vanilla


Place the bread chunks into a large baking dish. Mix the remaining ingredients into a large bowl until well blended. Pour on top of the bread then mix it all around until all the bread is coated. 
I like to use my hands and mush it up to make sure its all nice and even, but you do not have to. 

Bake for around 30-45 minutes or until set. 

Optional Glaze:
1 tsp pumpkin pie spice
1/4 cup icing sugar
a little water
Mix above with a little bit of water to make a thin glaze. Pour over bread pudding after it has baked.
Maple syrup is also great on here. Or, heck! Why not just use both like we did!


This part if a personal preference. I like to cut the entire thing into small squares then put on the glaze/syrup and then serve it. Others just scoop or cut a piece. Cutting it into small squares lets the glaze and/or maple syrup cover more, not just the top. It looks nicer on your plate too!

Do you have a recipe to share with us? Let us know on our Facebook Group!


By Mommy Melissa
 photo 3mommiessig_zps86cc38de.jpg


Saturday, March 1, 2014

Crock-pot Chili with Corn Bread Side

One of my all time favourite winter meals to warm up with is chili. I love to make it in the crock pot so all the flavors can meld together and make it even tastier. Cumin and chili powder are the usual spices I use to spice it up to have a nice taste, but use what ever is your go-to spices.


The skillet corn bread recipe I have been glued to now is by The Pioneer Woman. Its a new food to me, as it is not to big of a deal in Canada. Now that I have tried it, I do not think chili is complete with out it! Its so yummy and crumbles perfectly into chili. Oh gosh, you need to try it if you haven't already!

Here is my basic Crock-Pot Chili Recipe. It never turns out quite the same because I rarely put the same things in twice but this is always how it begins.

Basic Chili
1lb ground beef, cooked and drained (or ground chicken/turkey/pork, crumbled firm tofu, or nothing at all)
1 large onion, diced
2 cloves garlic, chopped fine
1 can diced tomatoes
1 can red kidney beans
1 can white kidney beans (I have replaced these with any other beans ie: chickpeas, pinto, lentils etc)
1 large can tomato sauce
2 cans of tomato soup
1 can sliced mushrooms, drained (or fresh if you have)
1.5 tbs ground cumin
1.5 tbs chili powder
salt and pepper
hot sauce to your spice level

optional ingredients I also like to add if they are on hand
1 chopped bell pepper (green, red, orange, yellow or mix them up)
2-3 stalks of celery, chopped
1 jalapeno pepper, seeds removed and chopped

Directions
Brown the ground beef in a fry pan along with the onion and garlic. Drain.

Place everything into the crock-pot and cook on high for at least 2 hours (low if you want to go longer)

Thats it! Now you can serve it along with this simple skillet corn bread recipe.

As said before its from The Pioneer Woman. Click here to check it out on her page.

Skillet Corn Bread by The Pioneer Woman


Ingredients
1 cup yellow cornmeal
1/2 cup all-purpose flour
1 tablespoon baking powder
1 teaspoon salt
1 cup buttermilk
1/2 cup milk
1 whole egg
1/2 teaspoon baking soda
1/4 cup plus 2 tablespoons shortening

Directions
Preheat the oven to 450 degrees F.

Combine the cornmeal, flour, baking powder and salt in a bowl. Stir together.

Measure the buttermilk and milk into a measuring cup and add the egg. Stir together with a fork. Add the baking soda and stir.

Pour the milk mixture into the dry ingredients. Stir with a fork until combined.

In a small bowl, melt 1/4 cup shortening in the microwave. Slowly add the melted shortening to the batter, stirring until just combined.


In a cast-iron skillet, melt the remaining 2 tablespoons shortening over medium heat. Pour the batter into the hot skillet. (The batter should sizzle.) Spread to even out the surface. Cook on the stovetop for 1 minute, and then transfer to the oven and bake until golden brown, 20 to 25 minutes. The edges should be crispy!


I really hope that you enjoy this easy Chili recipe and give it a try.


By Mommy Melissa
 photo 3mommiessig_zps86cc38de.jpg


Saturday, November 9, 2013

Gingerbread Latte

Here is a festive warm drink to get you in the mood for the holiday season! 


Recipe for gingerbread syrup
1 1/2 c. water
1 c. white sugar
2 tsp. ground ginger
1/4 tsp. ground cinnamon
1/4 tsp. vanilla extract

1. Combine in pan. Bring to a boil, the reduce heat and simmer 20 minutes. 

2. Pour into container and cool.

To make Latte 
1 oz gingerbread syrup
2 oz espresso or very strong coffee
1/2 c. hot, frothed milk (I make mine by pouring the milk into a tupperware, putting the lid on, and shaking it like crazy. Then I remove the lid and microwave it in intervals until it's foamed up)
Sugar to taste
1/2 tsp cinnamon

1. Combine sugar, syrup, and espresso/coffee in cup.

2. Pour in hot milk, using spoon to hold back foam.

3. Dollop foam on top, and sprinkle with cinnamon.


                     Be sure to stay tuned for another giveaway coming soon! 

By Mommy Jenn

 photo 3mommiessig_zps86cc38de.jpg

Wednesday, November 6, 2013

Apple Carrot Cake with Pumpkin Spice Cream Cheese Frosting

Here is a quick cake idea I had come up with. Using the idea from a pineapple dump cake recipe, I decided to give it a shot! The end result was really tasty and perfect to finish off a meal in the fall. It has the flavours of autumn in it.

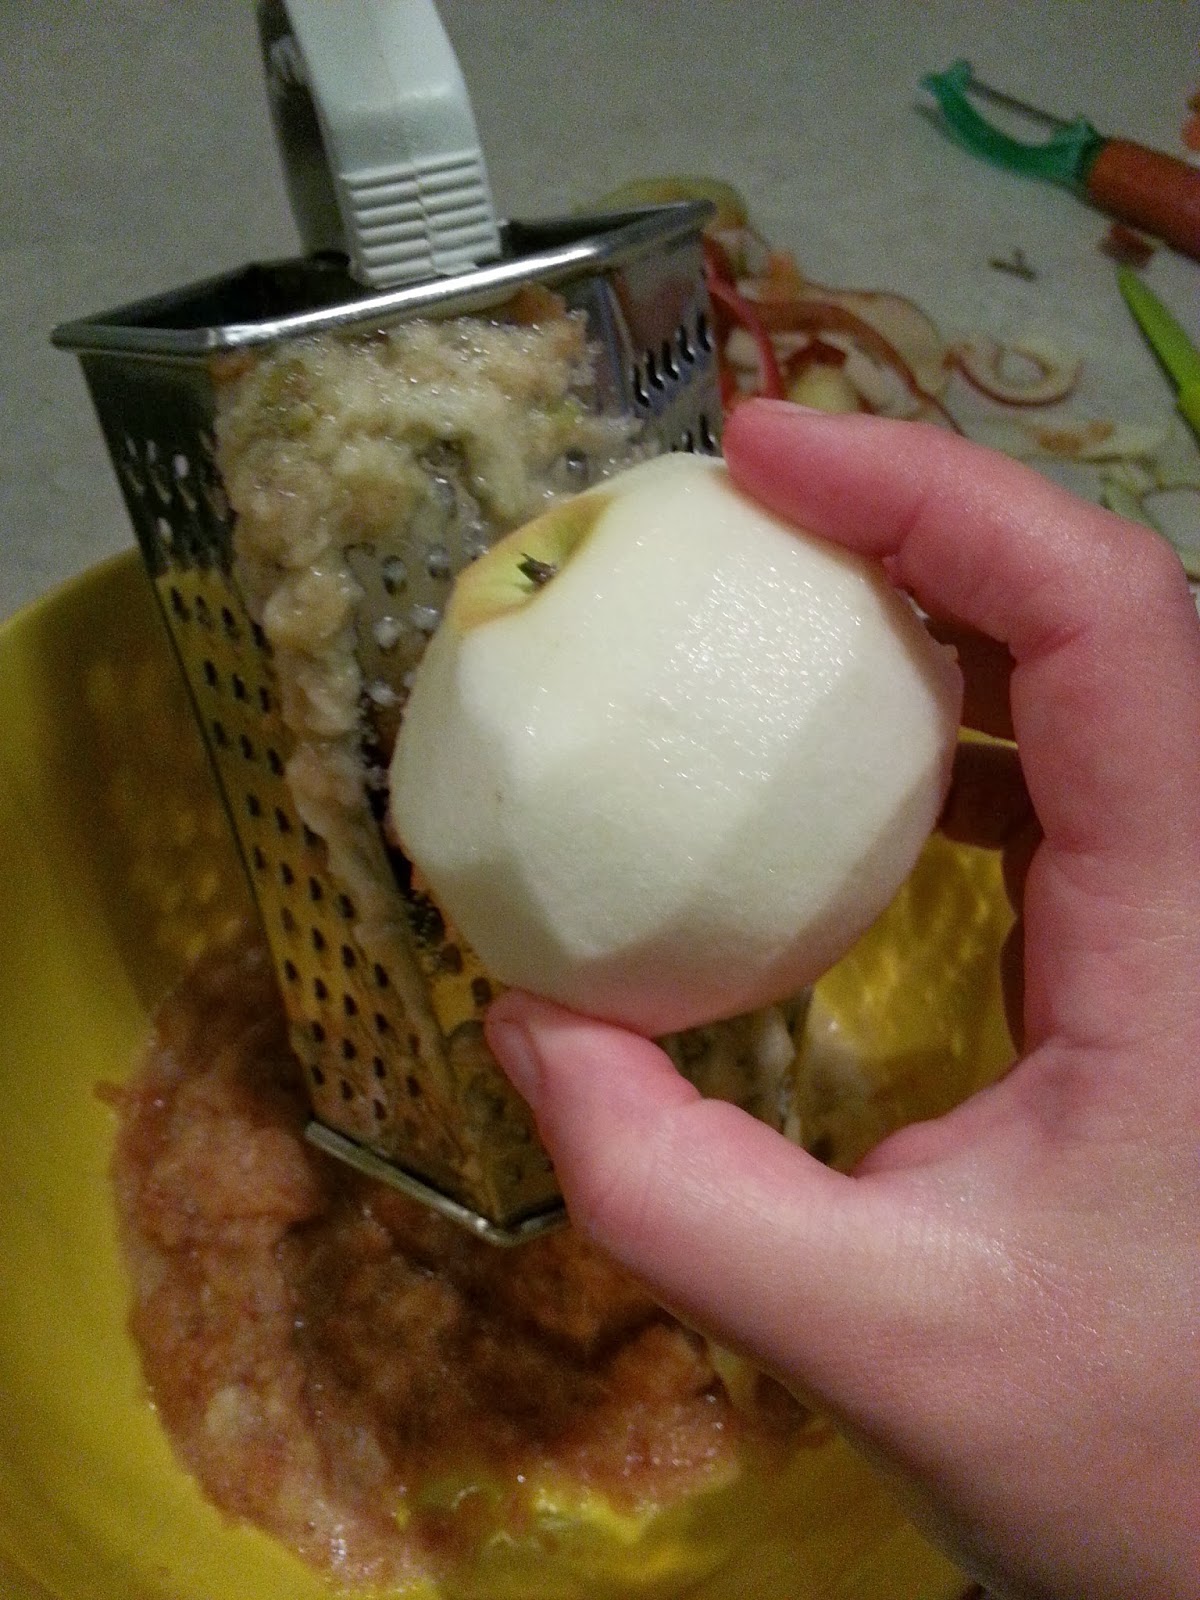
First I started by grating four large peeled apples. Then I poured a carrot cake mixture on top. Just the box of mix, not the other ingredients it called for. Once it was all mixed up I baked it for 40 minutes at 350.


While it was baking, I prepared the pumpkin spice cream cheese icing. (it tastes as good as it sounds!)


Mix them all together in a mixer and whip it until it is nice and fluffy. If you want to give it an extra pumpkin boost, pumpkin puree added would be amazing. I wanted to but there was none to be found that day.
Once the cake is out of the oven and cooled, ice it with the frosting then sprinkle with a little cinnamon for some pizzazz!

Here is the full recipe
1 box carrot cake mix
4 grated large apples, peeled
1 block of cream cheese, softened
3 cups icing sugar
1/2 tsp vanilla
1/2 tsp pumpkin pie spice
1 tbsp pumpkin puree (optional)
cinnamon to sprinkle on top

1. Mix the grated apples with the cake mix. Pour into baking dish.
2. Bake at 350 for around 30-40 minutes or until toothpick comes out clean.
3. Whip the remaining ingredients in a mixer until light and fluffy.
4. Spread the frosting over cooled cake. Sprinkle cinnamon on top.

Be sure to stay tuned for another giveaway coming soon! 

By Mommy Melissa

 photo 3mommiessig_zps86cc38de.jpg

Friday, November 1, 2013

Super Easy Caramel Apples!

Nothing says Fall like fresh apples. And nothing says YUM like dipping those apples in melted, gooey caramel. Every year I make treats to send in for the kids classmates on Halloween, and this year I decided on caramel apples. But I'm a little lot short on time and already had a box to paint to look like a Minecraft zombie head, so I didn't want to make the caramel from scratch (although I do have a very good caramel recipe written down somewhere). This recipe is super simple and virtually fool proof. Here it is!
 
Start with your apples. I had to use 47 of them.

 
After I took this picture, I twisted off every stem and inserted popsicle sticks. After doing about 10 of them I started stabbing them with a knife and then putting the sticks in. Much easier.
 
I'll apologize in advance because I forgot to take any pictures until I was done. I made these at about 2am and really just wanted to go to bed.
 
Now for the caramel. I used 9 180g bags of those individually wrapped chewy caramel squares. 3 bags did 12-15 apples. If you have kids making these with you, get them to unwrap the caramel. It's tedious and boring and I swear they glue those suckers closed.
 
Once you have your 3 bags unwrapped, dump them into a microwave safe bowl, along with 2 tbsp of water. Microwave for one minute; stir. Microwave another minute; stir. Do that one more time, and you should be all melted and ready to go!
 
Now you just swirl away! You could roll in virtually any toppings you want at this point, but I decided to skip it for the sake of getting at least a few hours of sleep. I like sleep. After coating each apple, scrape the bottom with a spoon (a lot of caramel will pool here) and place it on a square of wax paper. I found the paper made it a lot easier to put the apples into cellophane bags.
 
If you are bagging them, do not put them in the fridge! They will weep and we don't want that. Bagged up at room temperature, they should keep about a week depending on the freshness of the apple. Roughly the same time in the fridge, too.
 
There you go! These really couldn't be any easier... or yummier! Enjoy :)