Sunday, August 31, 2014

Lasagna Turkey Burgers

I was thinking about all the different ways to turn ground turkey into something delish when I came up with this recipe. At first I wasn't sure if it would work because the ingredients have a lot of water in them, but they ended up turning out great and sooo amazingly tender. My sister raved about these for a week straight!


What you will need: 
1 pkg extra lean ground turkey
1 cup of ricotta cheese
1 egg
1/2 cup Panko bread crumbs
1 pkg of frozen chopped spinach- thawed
salt and pepper to taste
1 tsp onion salt
1 tsp of Italian seasoning
1 tsp garlic powder
2 cups of pasta sauce (homemade or store bought) 
1 cup shredded mozzarella cheese
Hamburger buns 

First you will want to strain your spinach to soak up the excess water, you can do this by putting a few layers of paper towel in the strainer and put the spinach on top and using a spoon press down on the spinach until the excess water is gone, or you can squeeze the spinach between a clean towel to get rid of the excess water. IMPORTANT: MAKE SURE THE SPINACH IS AS DRAINED OF THE WATER AS YOU CAN GET IT! 

Next, drain the water in the ricotta cheese container container so you are only working with the cheese itself. Add the spinach, cheese, egg, turkey, Panko, and seasonings to the bowl and mix together (using hands is the best way). 

(Preheat oven to 350 before cooking burgers) Heat large pan on medium-low heat (or medium depending on your stove) with 1-2 tbsp of Extra Virgin Olive Oil, and form you mixture into patties, ensure to press down on the centers of the patty for an even cook. Mine took about 10 minutes each side, keep and eye because they will burn fast! And don't try to flip them too soon, because they will break.

Once your burgers are cooked, on a cookie sheet lay out the buns (both bottom and top half) and on the bottom halves put your turkey burger, pasta sauce and shredded mozzarella and cook in the oven for about 7 mins (make sure your buns don't burn! You just want to make the buns toasty and melt the cheese, so just enough time for that. Then take them out and enjoy!

POST BY MOMMY OLIVIA


Saturday, August 23, 2014

Chickpea, Veggie, and Cilantro Salad

This dish is really fresh, and is a great source of protein- so great for the vegans and vegetarians out there! You must use all the ingredients I list to get the whole effect- unless you do not like onions (feel free to omit those!)

What you will need:
1 can of chickpeas- strained and rinsed (to get the tin flavor out)
1 lime
1 container of cherry or grape tomatoes- halved
1/2 red onion- diced
1 handful of chopped cilantro

After you all your ingredients chopped add them to a medium sized bowl, and slice you lime in half and squeeze the juice over top. Add a dash of salt and pepper, and mix all together until flavors are combined. That's it! simple and delicious!

Recipe servers 2 people (if your eating as a meal) or 3-4 people if your using it as a side.

POST BY MOMMY OLIVIA


Wednesday, August 13, 2014

Personal Pan Pizza with Easy No-Yeast Dough


Having two toddlers and a husband who always want to have pizza for every and any meal of the day,
I needed to make a recipe that was easy to fast and super simple to prepare.
I came up with this idea using a similar dough recipe from a cook book plus changed a few things to
make it how I wanted it to come out.
After two attempts, the recipe works great!
The dough is versatile enough to be used with different spices to give it your own personal touch.

Complete recipe is at the bottom.

This is all you need to make this pizza dough! 
Flour, baking powder, salt, warm water, and olive oil.
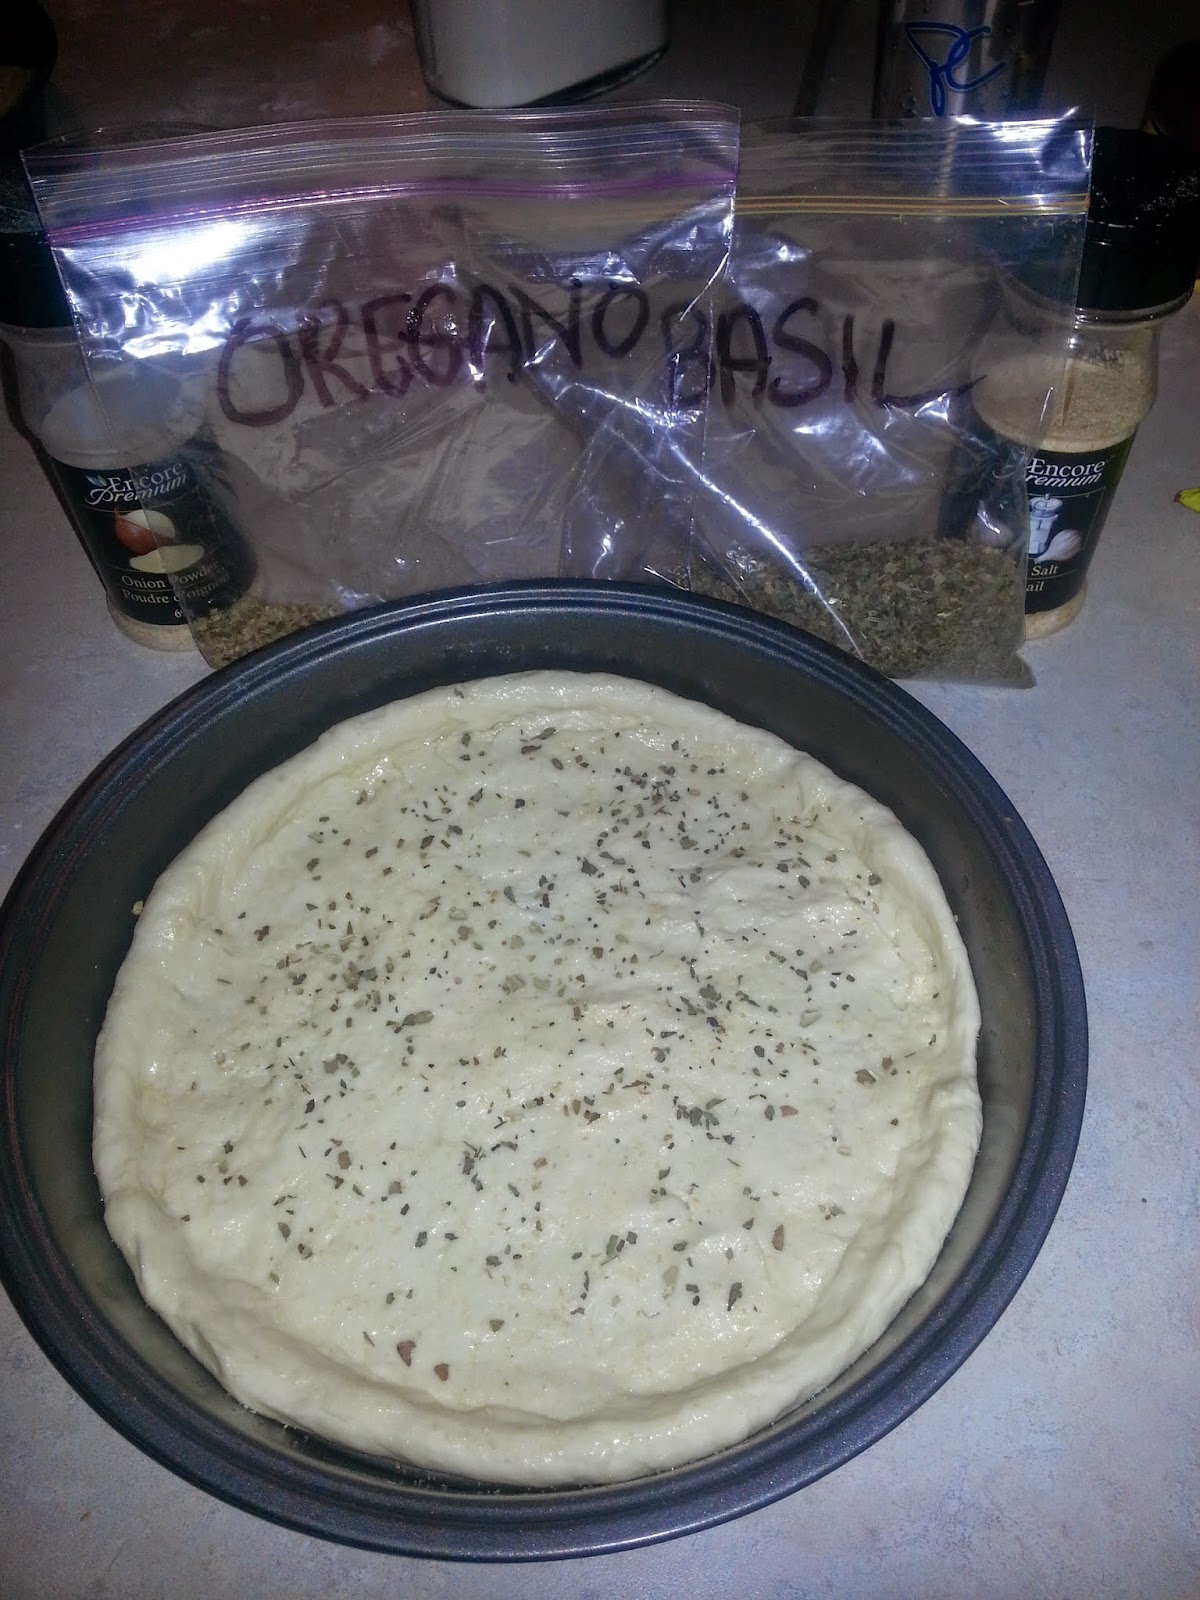
Adding some spices gives it that extra Italian flavour.

This dough is too sticky, it needs more flour.
This dough is perfect and ready to use.

When it comes to the spices you can use your own combinations you think would go well together. 
I like the taste of basil and oregano together with pizza. 
Some other options could be but are not limited to: 
garlic powder, onion powder, chili flakes, thyme, dried chives, chopped sun-dried tomatoes, 
cracked pepper, Italian seasoning, pretty much anything you think would taste good!


Once the dough has come out of the oven now you can add your toppings. 
I went with spicy pizza sauce, cheese, and pepperoni. 


Here are some of my families favourite topping combinations.

Alldressed - pepperoni, mushrooms, green peppers.
Veggies - green peppers, mushrooms, tomatoes, olives.
Italian -sausage, mushrooms, olives, fresh basil.
Buffalo Chicken - cooked chicken pieces, tomatoes, feta cheese, hot sauce.
Super Cheese - mozzarella, cheddar, parmesan, montery jack.

Some other topping ideas are:
spinach, black and/or green olives, onions, cooked bacon, cooked ham, pineapple, cooked ground beef,
garlic, hot peppers, sliced steak, and on and on and on!


Easy No-Yeast Pizza Dough
(makes two 9 inch pizzas)

2 1/2 cups of flour
2 1/2 tsp baking powder
1 tsp salt
1 tbs olive oil, plus more to drizzle over dough
1 cup of warm water, less or more depending on dough
1/2 tsp dried basil 
1/2 tsp dried oregano

1. Mix flour, baking powder, and salt together. 
2. Add the olive oil and warm water. If the dough is too sticky add more flour. If too stiff, more water.
3. Put dough on a surface covered with flour and knead for a couple of minutes. 
4. Grease a round cake or pie pan with some extra olive oil. 
5. Using you hands flatten the dough into a even circle, place into greased pan and stretch it the rest of the way to the edges and up a little to form a nice crust. Sprinkle with basil, oregano, and a little bit of olive oil.
6. Bake at 400f for about 25 minutes. 
7. Remove from oven then add your toppings. 
8. Bake another 5 minutes until cheese is all melty. Broil for a few more to make the cheese toasty brown.
9. Enjoy it with some extra warm pizza sauce on the side to dip it in!


Give it a try with your pizza lovers in your family! Get your kids involved by letting them help you knead the dough and flatten them out themselves. Then letting them top their very own pizza!


By Mommy Melissa

Wednesday, June 18, 2014

Beat the Heat with a Frozen Raspberry Green Tea!


Summertime is nearly upon us and that means it's time for icy cold drinks, preferably created with a blender. I'm on a serious blender kick lately. Like, 3 different blended beverages a day at least. Is there some kind of Blenderholics Anonymous I could sign up for? 

That beautiful, frosty glass of pink up there is what triggered my blendermania. I couldn't get Tim Horton's Frozen Raspberry Green /Tea out of my head, but the closest Timmies is a half hour walk and it was just too hot to get there on foot with two kids in a stroller and one strapped to my back. So, I made my own, and it was way tastier. And cheaper! And then I ran out of raspberries and got sad because grocery day isn't until Friday so I couldn't make any more.

Here's the recipe:

4 Green Tea bags
2 cups boiling water
1/4 cup honey (although sugar would work just fine)
1 1/2 cups frozen raspberries 

(Please note: my raspberry measurement is an approximation. I was dealing with all the little bits in the bottom of the bag  and I was hot and just wanted my damn drink so I just dumped it in the blender. It looked to me like a cup and a half. You could use more or less depending on taste, same with the honey)

1. Pour boiling water over tea bags. Steep until desired strength, remove tea bags, and allow tea to cool. I threw mine in the freezer after 5 minutes or so of cooling on the counter, just to speed things up)

2. Pour cold tea into blender. Add frozen raspberries and honey. Blend, and serve!

*This recipe made the tall glass pictured above, plus a plastic cup full for my little guy, who LOVED it. He's definitely his mama's son :)*


Tuesday, June 17, 2014

Homemade Donuts

This is so easy! I saw this floating around on Pinterest and had to try it! All you need is Pillsbury biscuit dough, mold the dough together and cut out donut shapes. Then in a deep pan fill about 1/4 the way with vegetable oil and heat on medium-low. Put your donuts in carefully and keep an eye on them so they don't burn! Once they are cooked putting them on a cookie sheet and coat with sugar or whatever topping you like!


POST BY MOMMY OLIVIA


Monday, June 16, 2014

Chicken Lemon Rice Soup

The spring weather has inspired a fresh soup! I don't know about you but in my house the flu keeps going around, once someone recovers they get it again and nothing soothes a sore throat like chicken soup and lemons! So why not combine them?


What you will need:
1 onion
3 cloves garlic minced
1 carrot chopped
6 cups chicken stock
1 lemon
1tsp basil
1 cup of long grain rice
2 tbsp. olive oil

In a large pot over medium heat, heat the olive oil then add in your carrots onion and garlic, sauté for about 5 minutes or until translucent.

Add in the chicken stock and simmer for about 15 minutes.

Add in the rice cover and simmer for about 15 more minutes or until rice is cooked.

Then add in the juice of 1 lemon (make sure there are no seeds!) And the basil. Stir all together. Enjoy!

POST BY MOMMY OLIVIA


Sunday, June 15, 2014

Pinterest Challenge: Pot Roast Noodles

Since it's Father's Day weekend I let Phil go through all my favourite recipes on Pinterest and pick whatever one he wanted for dinner. So he chose these Pot Roast Noodles. A lot of work, but very delicious! For the original recipe click HERE.


What you will need:

1 can of sliced mushrooms (drained)
2 1/2 pound chuck roast
Coarse salt and freshly ground pepper
3 tablespoons olive oil
1 each, chopped: carrot, onion, rib celery
2 cloves garlic, chopped
2 cups beef broth
1 cup red wine
6 ounces tomato paste
2 bay leaves
1 sprig fresh thyme
8 ounces pappardelle egg noodles

1. Preheat oven to 325 degrees, Season meat generously with salt and pepper.

2. Heat olive oil in a Dutch oven over medium heat. Brown meat, about 2 minutes per side. Lift out; set aside. Add carrot, onion, celery and garlic to the pot. Cook, stirring, until softened, about 10 minutes. Add broth, wine, tomato paste, mushrooms, bay leaves and thyme. Heat to a boil. Return meat to the pot. Liquid should come about two thirds the way up the sides of the roast. Cover.

3. Place in oven; cook, turning roast once and basting occasionally, until very tender when prodded with a fork, 2-2 1/2 hours.

4. Set pot on stovetop. Remove meat from pot. Shred. Discard any fat. Discard bay leaves and thyme sprig. Stir shredded meat into sauce; keep warm over low heat.

5. Heat a large pot of salted water to a boil. Cook noodles until tender but firm. Drain. Add noodles to meat and sauce. Toss gently.

Enjoy!

POST BY MOMMY OLIVIA